- Map View
- Boards
- Tasks
- Org Chart
- Send Email
- Bulk Actions
With Rolodex, you can easily visualize and comprehend the geographical distribution of your network. Simply import your contacts or sync from LinkedIn, and Rolodex will map them based on their specified locations or addresses.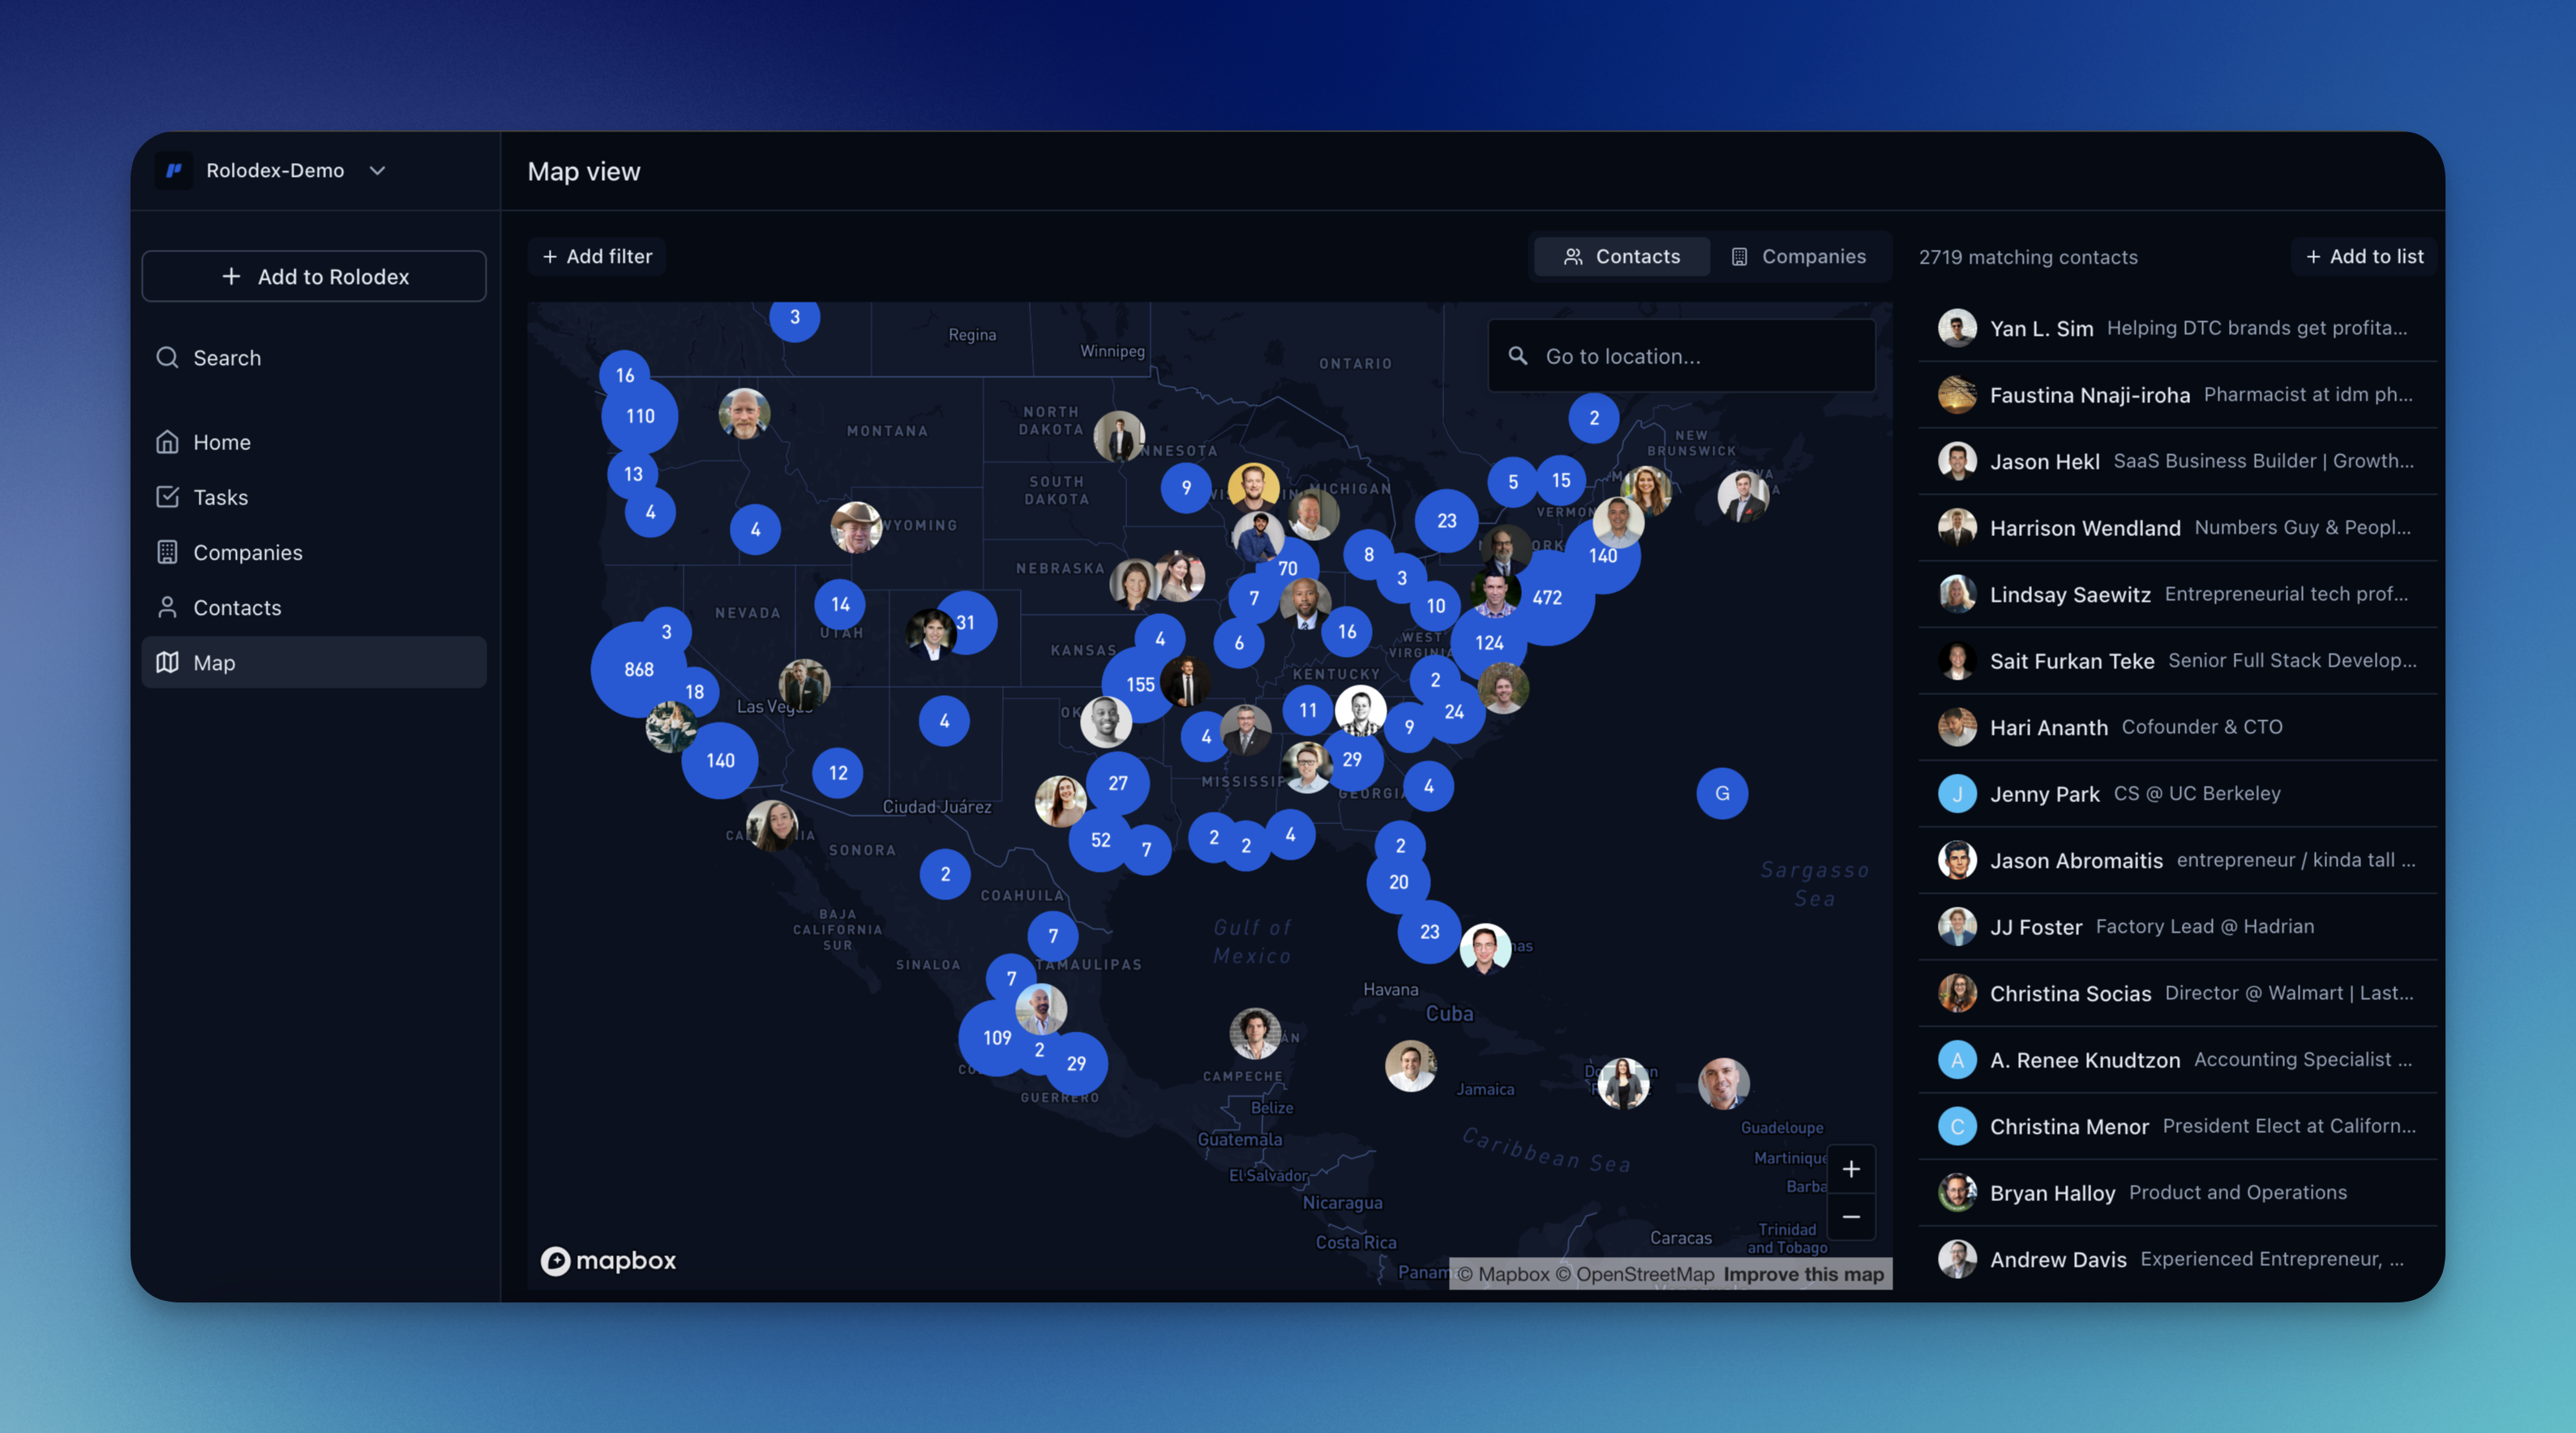 How it works:Moving around the map will change the list of contacts to the map. The map view is only available on the web/desktop app, and will also populate on LinkedIn location values. A few other notes notes:
How it works:Moving around the map will change the list of contacts to the map. The map view is only available on the web/desktop app, and will also populate on LinkedIn location values. A few other notes notes:- See Nearby Contacts: From a contact screen: click on a contact’s location to view them in map view.
- Contacts by Location: Write in a Location in the map and see all of your contacts in that location. Perfect when out traveling!
- Map View Refresh: when locations are edited from the map view, you may need to refresh the map view to see changes updated appropriately.
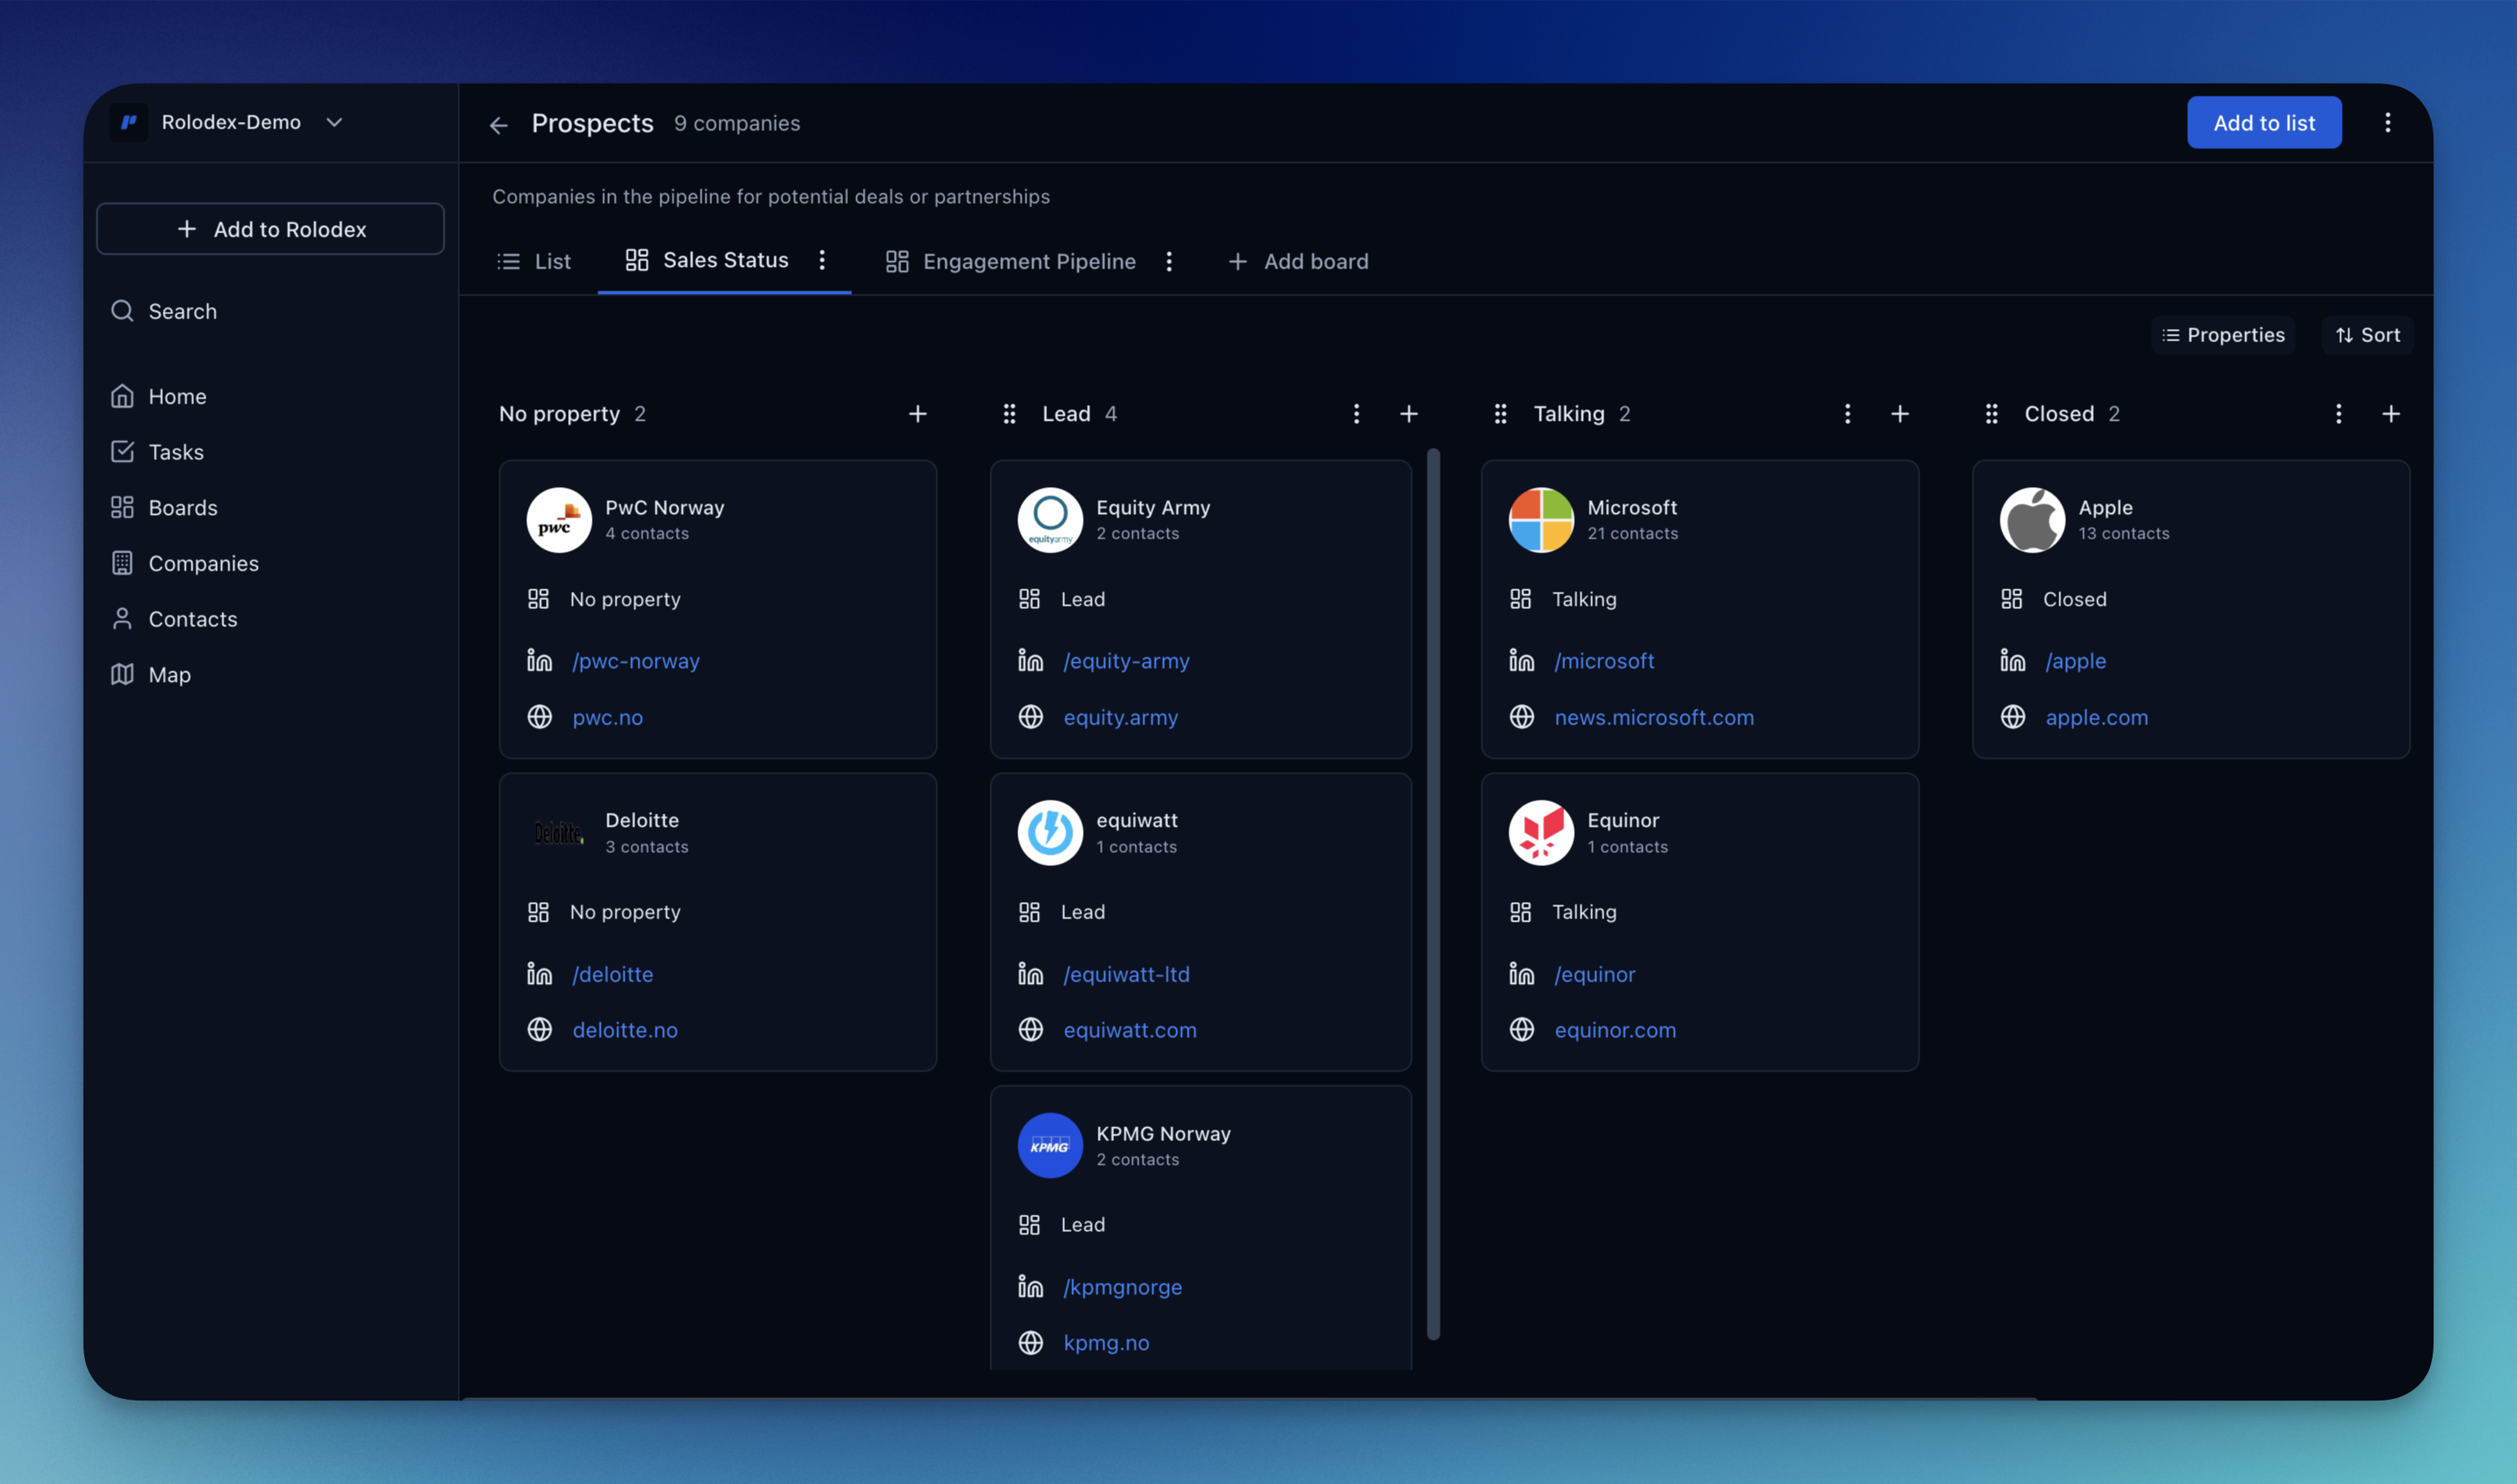
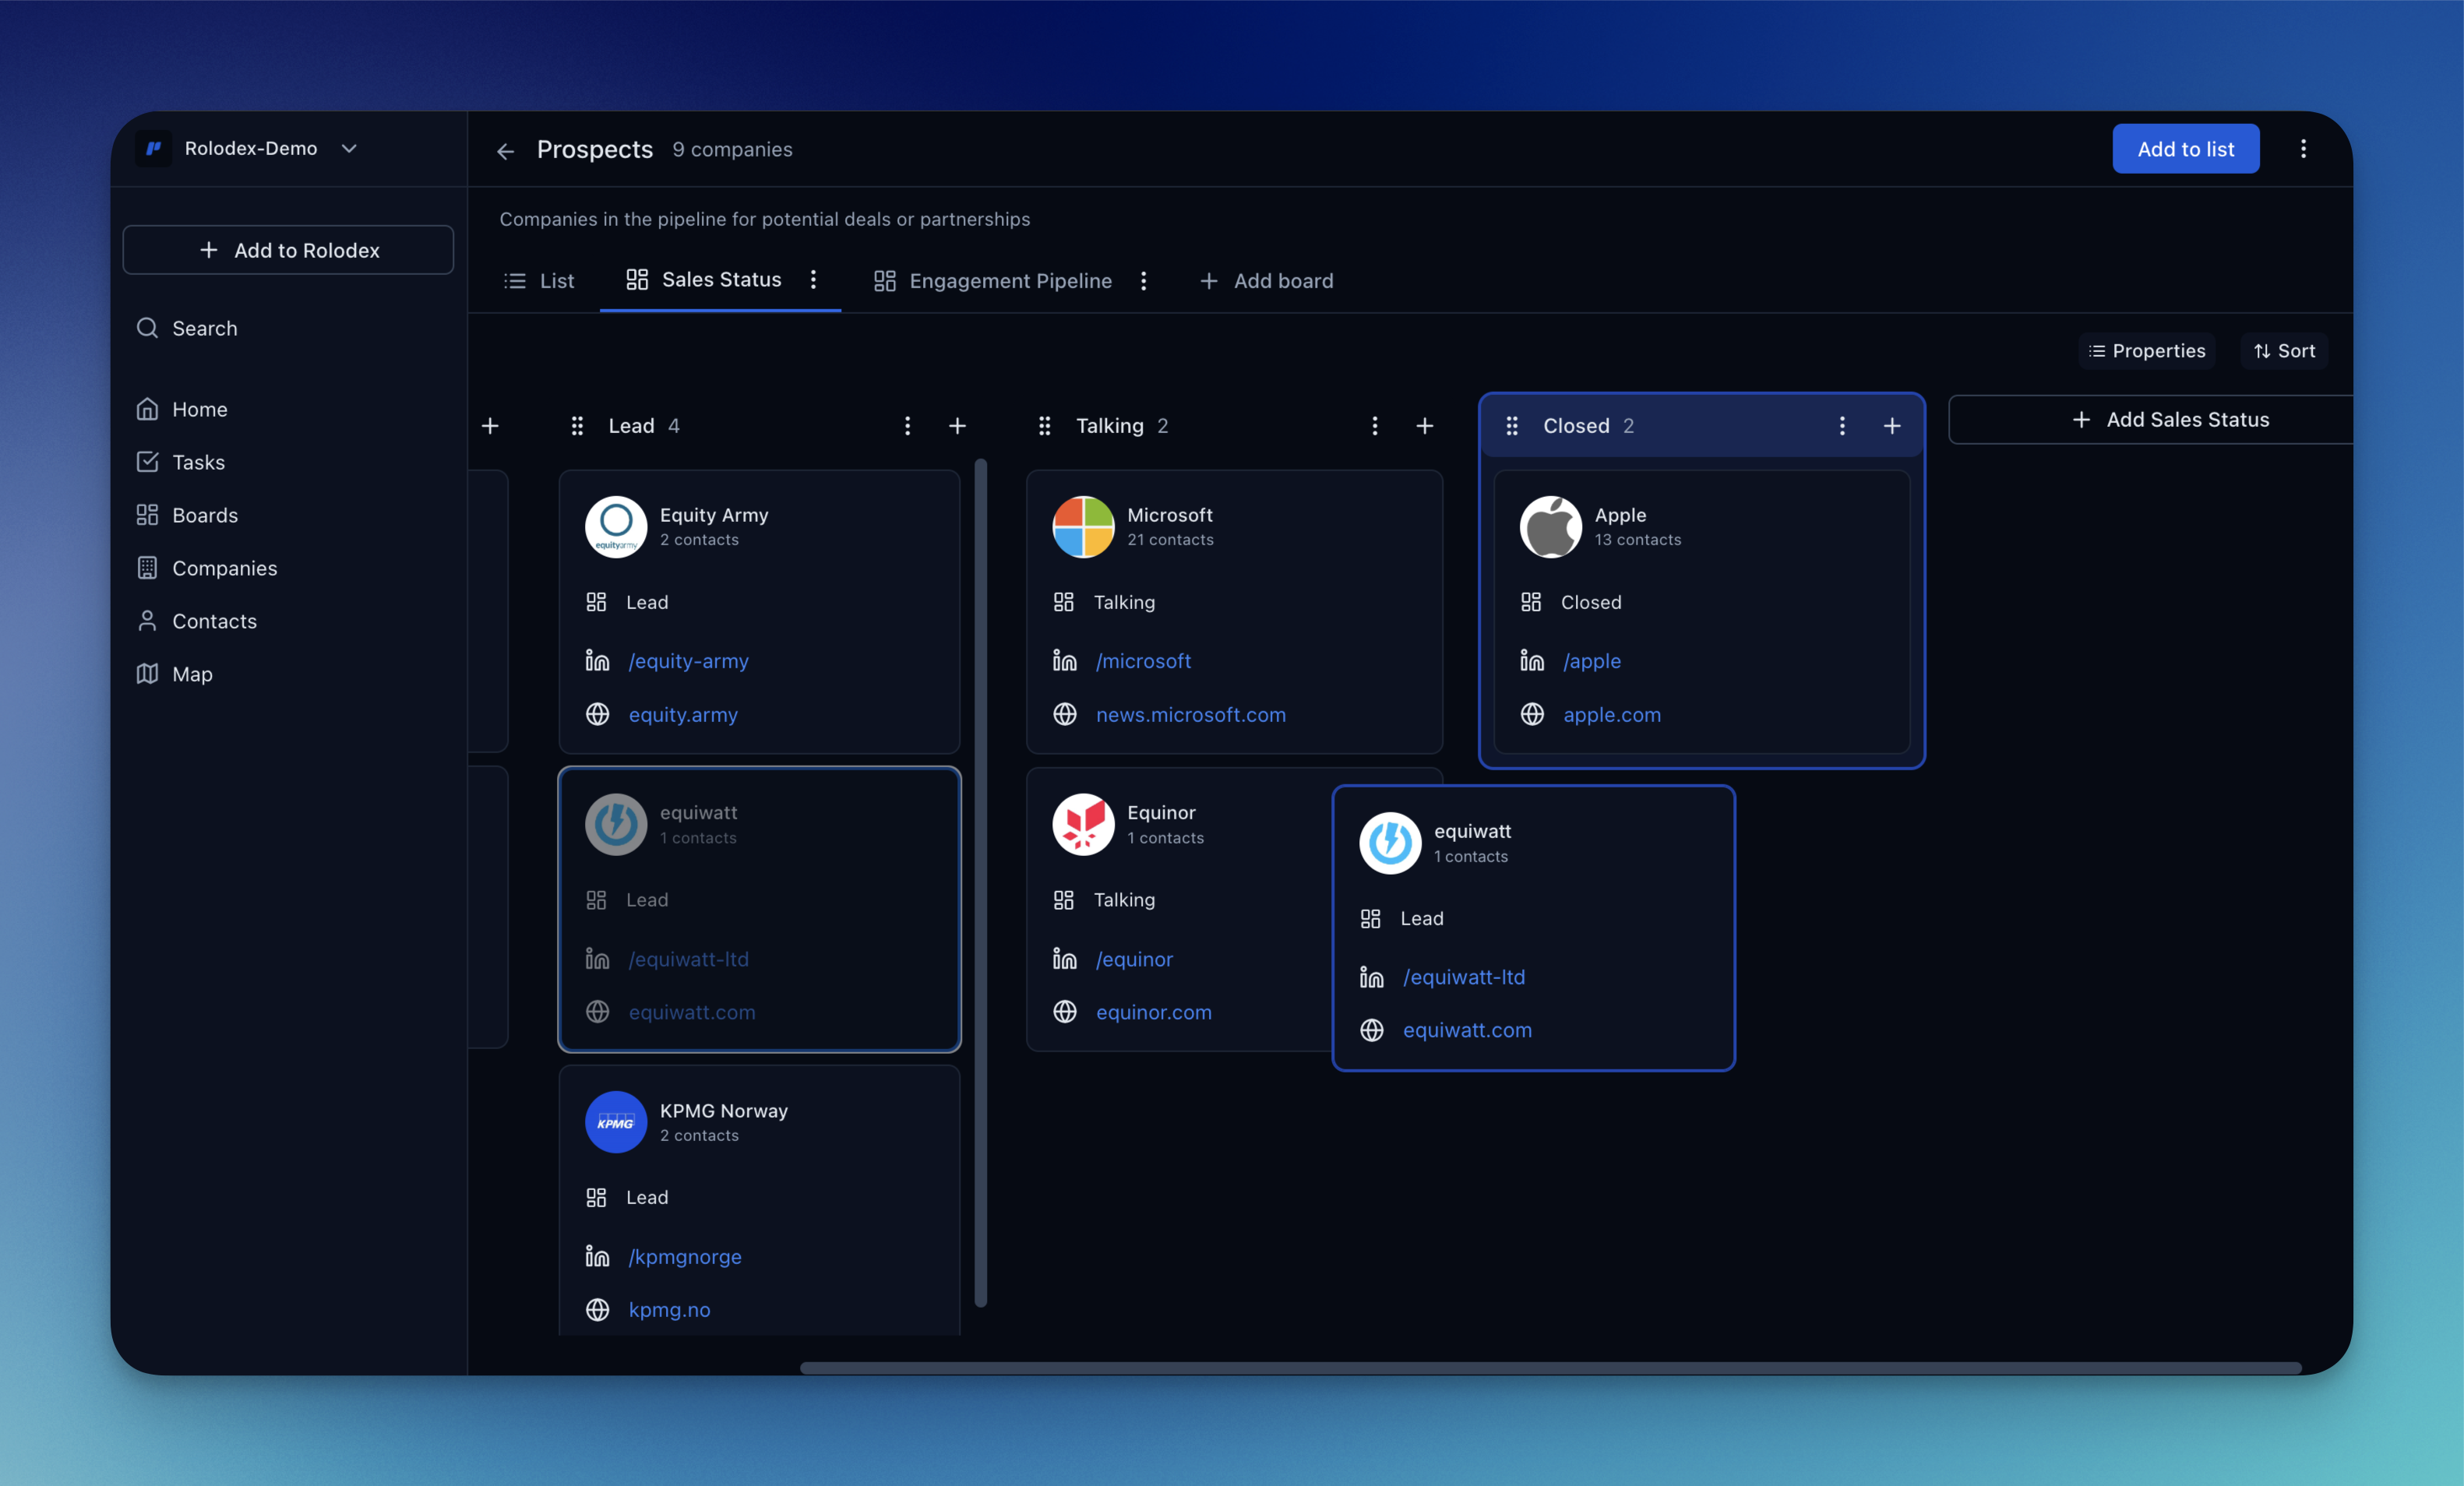
Within Rolodex, you can organize and manage your contacts in customizable stages. Move contacts and companies through a tailored workflow that fits your needs—whether it’s tracking deals, job applications, client engagement, or outreach efforts. The board view enables you to create and arrange stages, drag and drop cards to update statuses, and maintain real-time visibility for your entire team.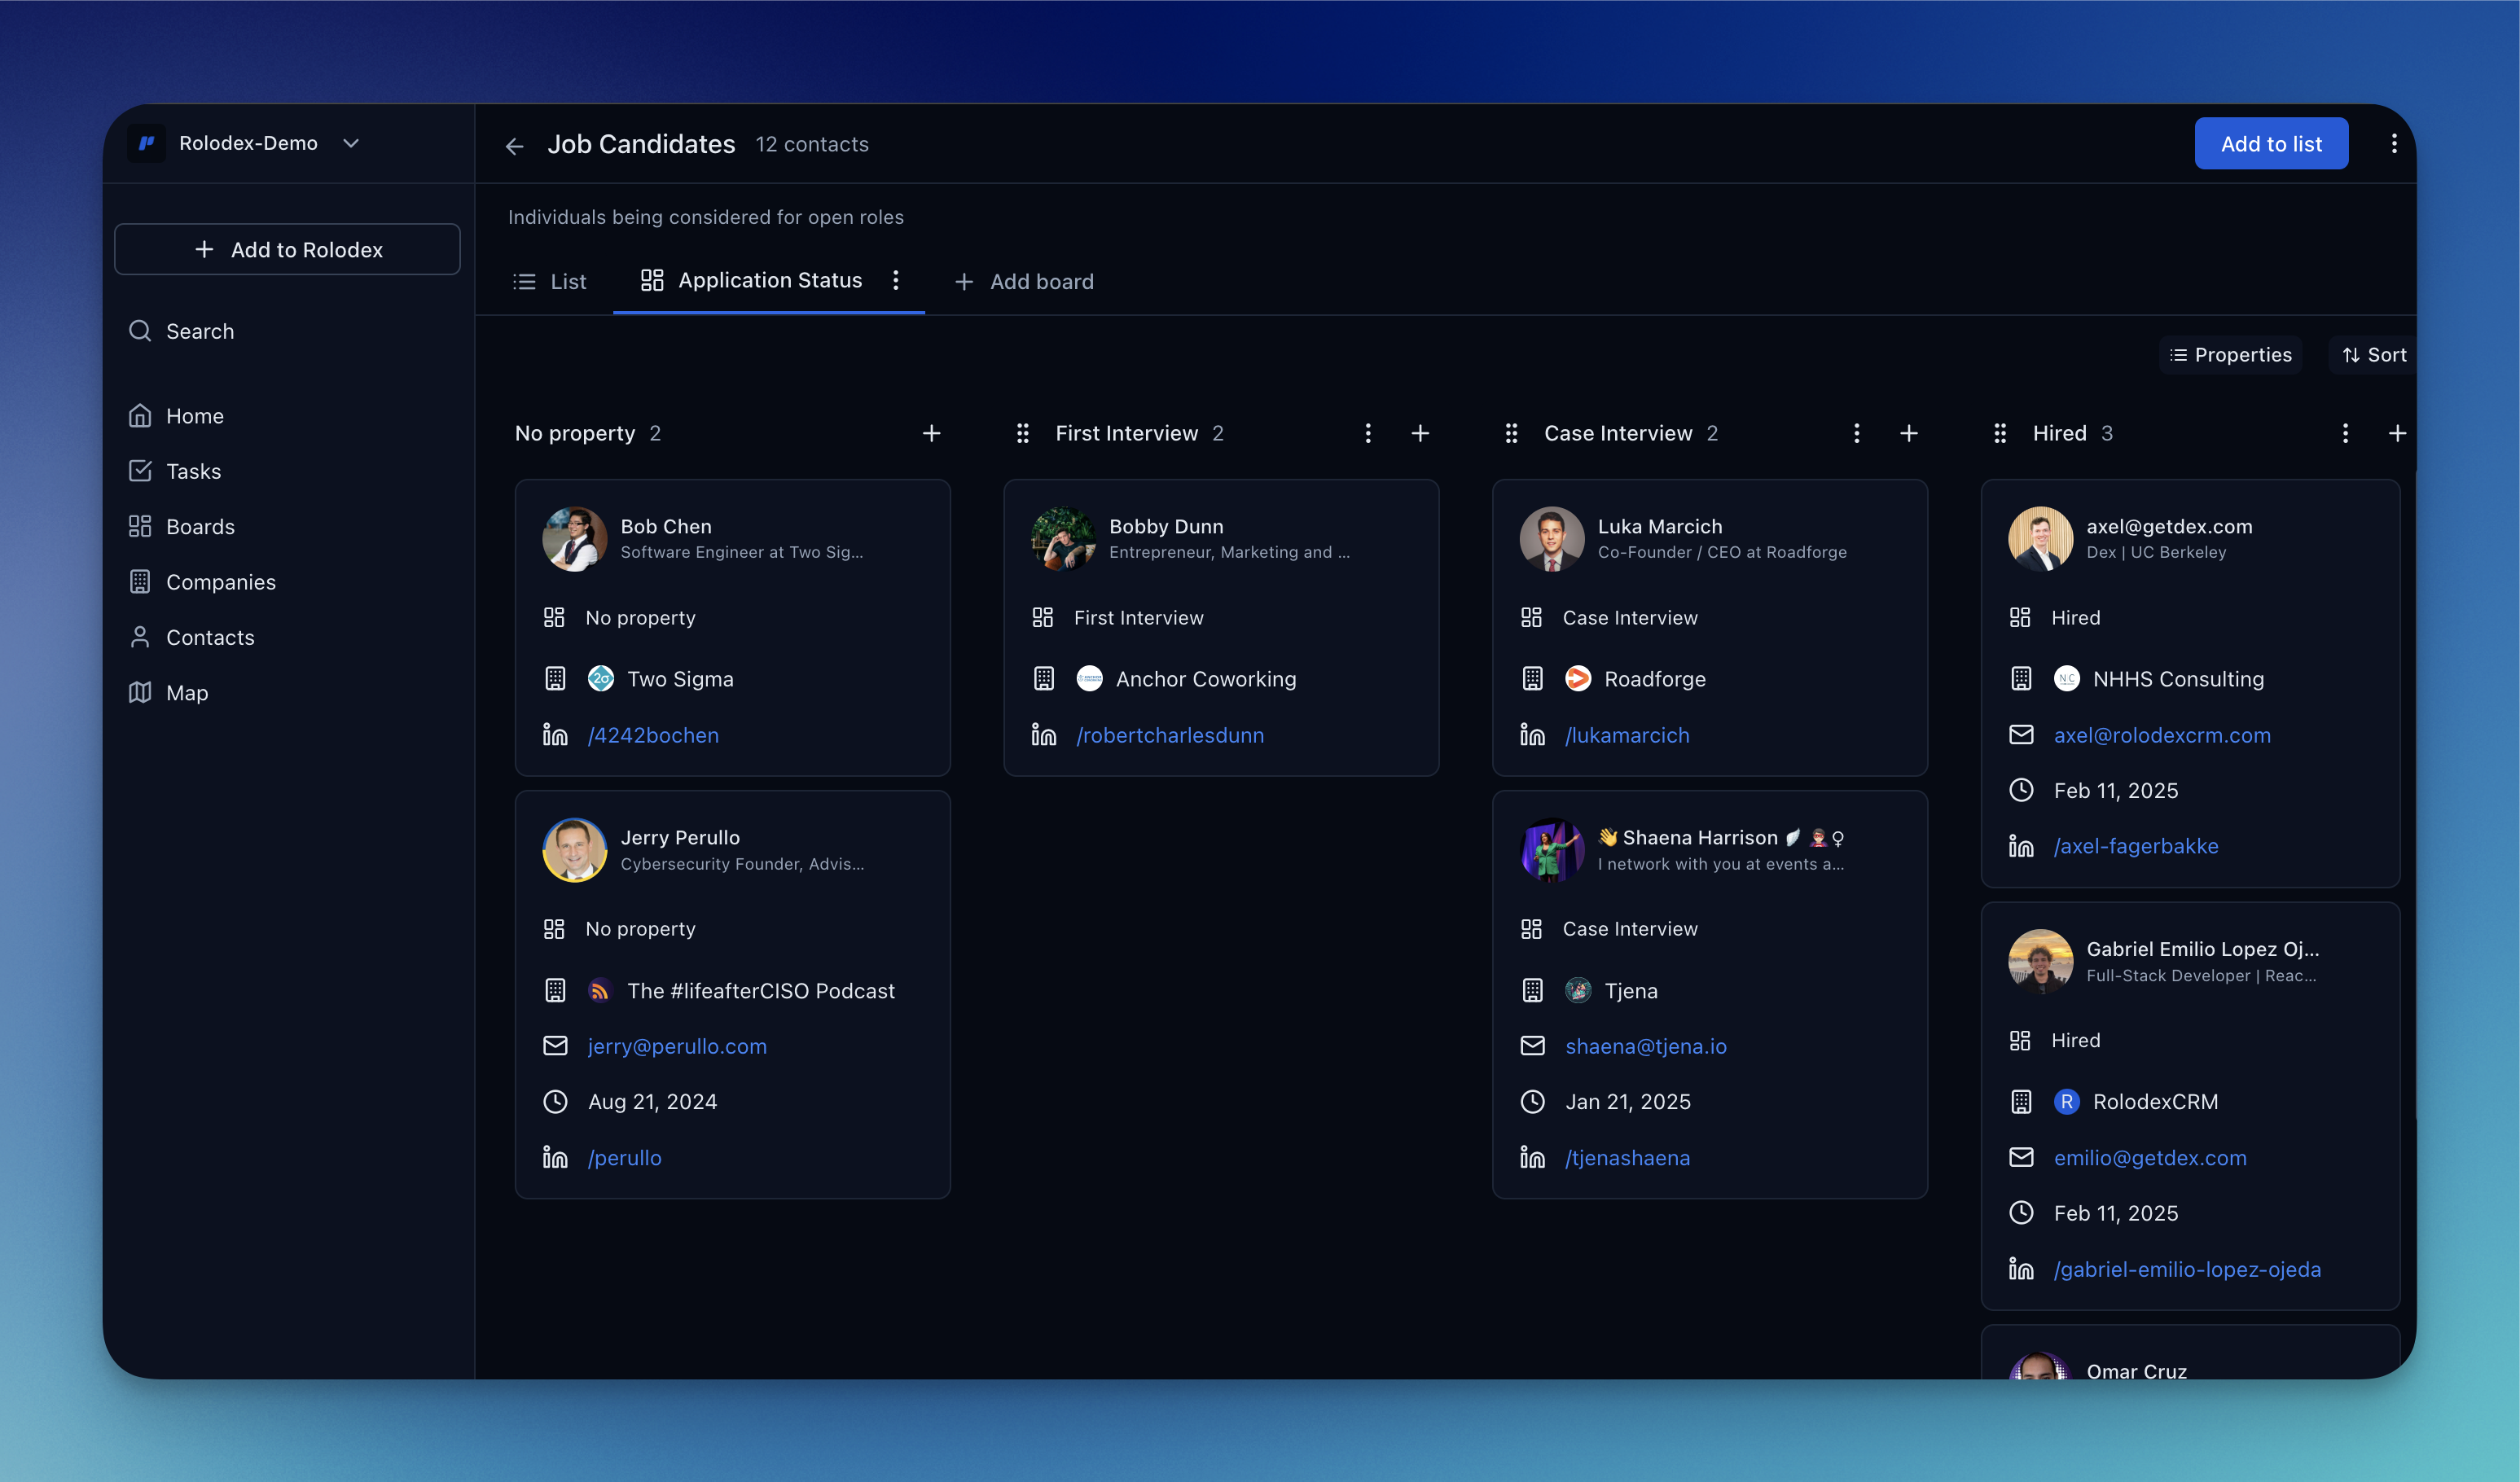
Setting Up a Board View
Prepare a List of Contacts or Companies
Boards are created based on a list. You can either create a board view for an existing list or create a new one. Contacts can be added or removed from the list and board at any time.
Select a Custom Field
The assigned property within the custom field determines a contact’s position in the board view. You can use an existing custom field in your workspace or create a new one. Add stages to the custom field under “Options.”
The custom field must be single-select to be used in a board.
Your Board View is Now Live
Assign properties to contacts and watch them automatically move into different stages. You can also drag and drop contacts to their designated stages. Any updates made in the board view will automatically update the custom field value for that contact across the entire workspace.
Examples
1) Engagement Pipeline (relationship warmth + next action)
Use this board when: you want a lightweight system to track where each relationship stands right now and what “next” looks like.-
Custom field (single-select):
Engagement Stage -
Stage options:
New / Not Engaged YetLight Touch (Liked/Commented)Warm Conversation StartedMeeting BookedFollow-up NeededActive RelationshipPaused / Not a Priority
2) Deal Stage (simple pipeline, no CRM headache)
Use this board when: you want a visual sales pipeline for a shortlist of opportunities (contacts or companies), without turning your day into “CRM chores.”-
Custom field (single-select):
Deal Stage -
Stage options:
ProspectingQualifiedDiscovery CompletedProposal SentNegotiationClosed WonClosed Lost
3) Sorting by Expertise (find the right brain fast)
Use this board when: you have a lot of contacts and need to instantly find “the right person” when a question pops up.-
Custom field (single-select):
Expertise -
Stage options:
ProductEngineeringDesignSales / GTMMarketingFinanceLegalOperationsOther
5) Event Follow-up Board (turn business cards into momentum)
Use this board when: you meet people at a conference/event and want a tight follow-up flow so no promising connection evaporates into the ether.- Custom field (single-select):
Event Follow-up Status - Stage options:
Met at EventAdded on LinkedInFirst Message SentReply ReceivedMeeting BookedFollow-up NeededConnected (Done)
- What it’s for: a repeatable post-event workflow. Everyone you meet starts at “Met at Event,” then you move them forward as you connect, message, and book meetings.
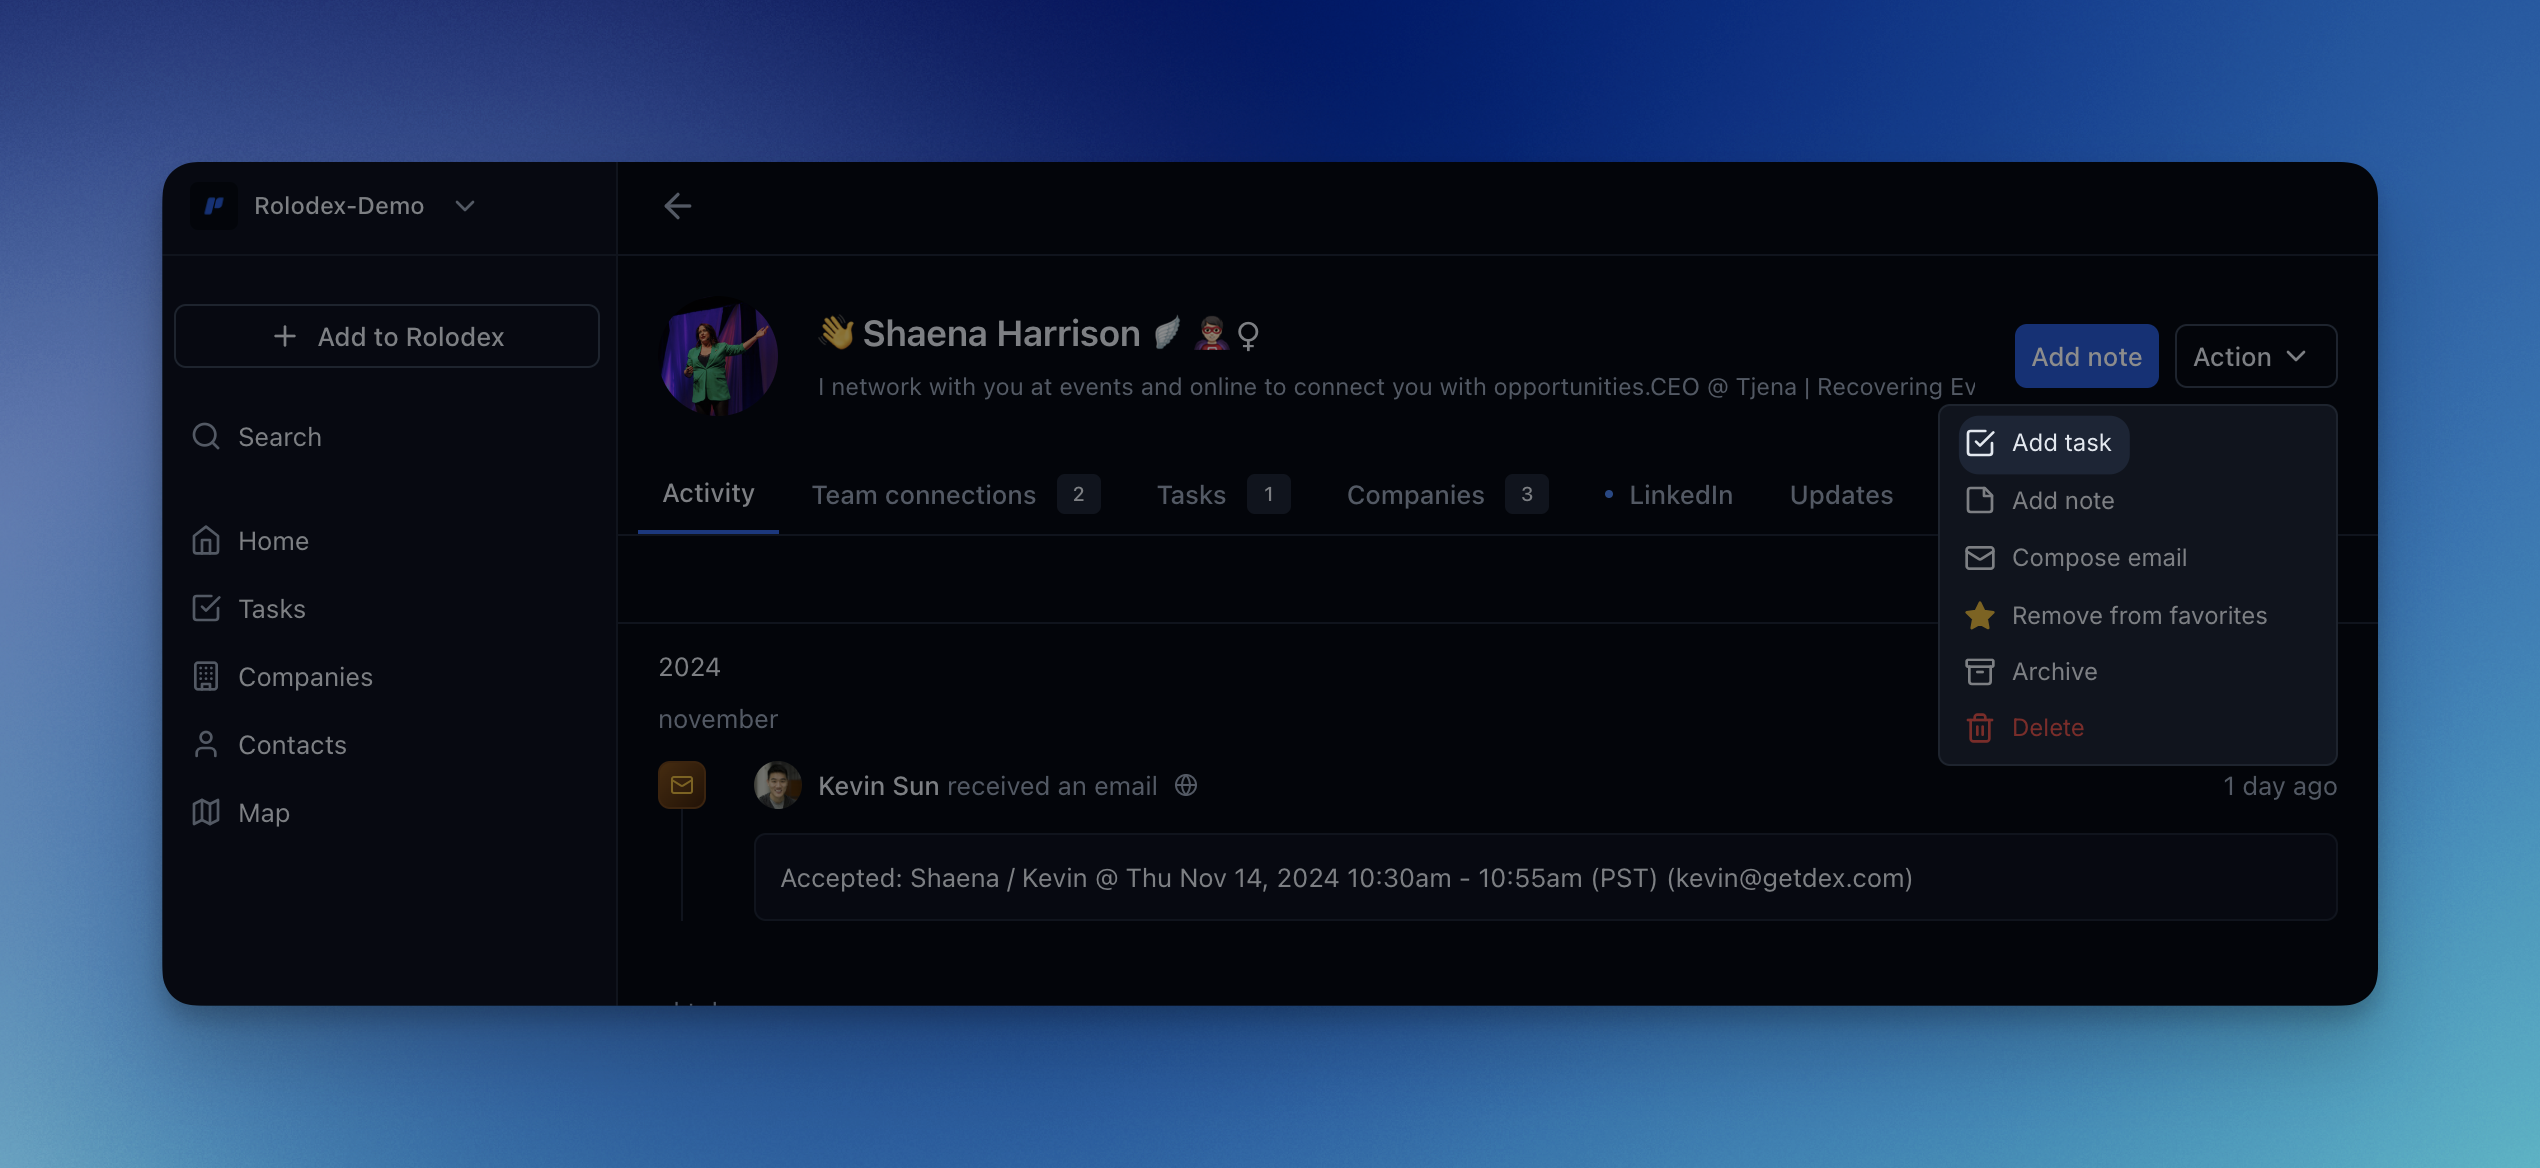
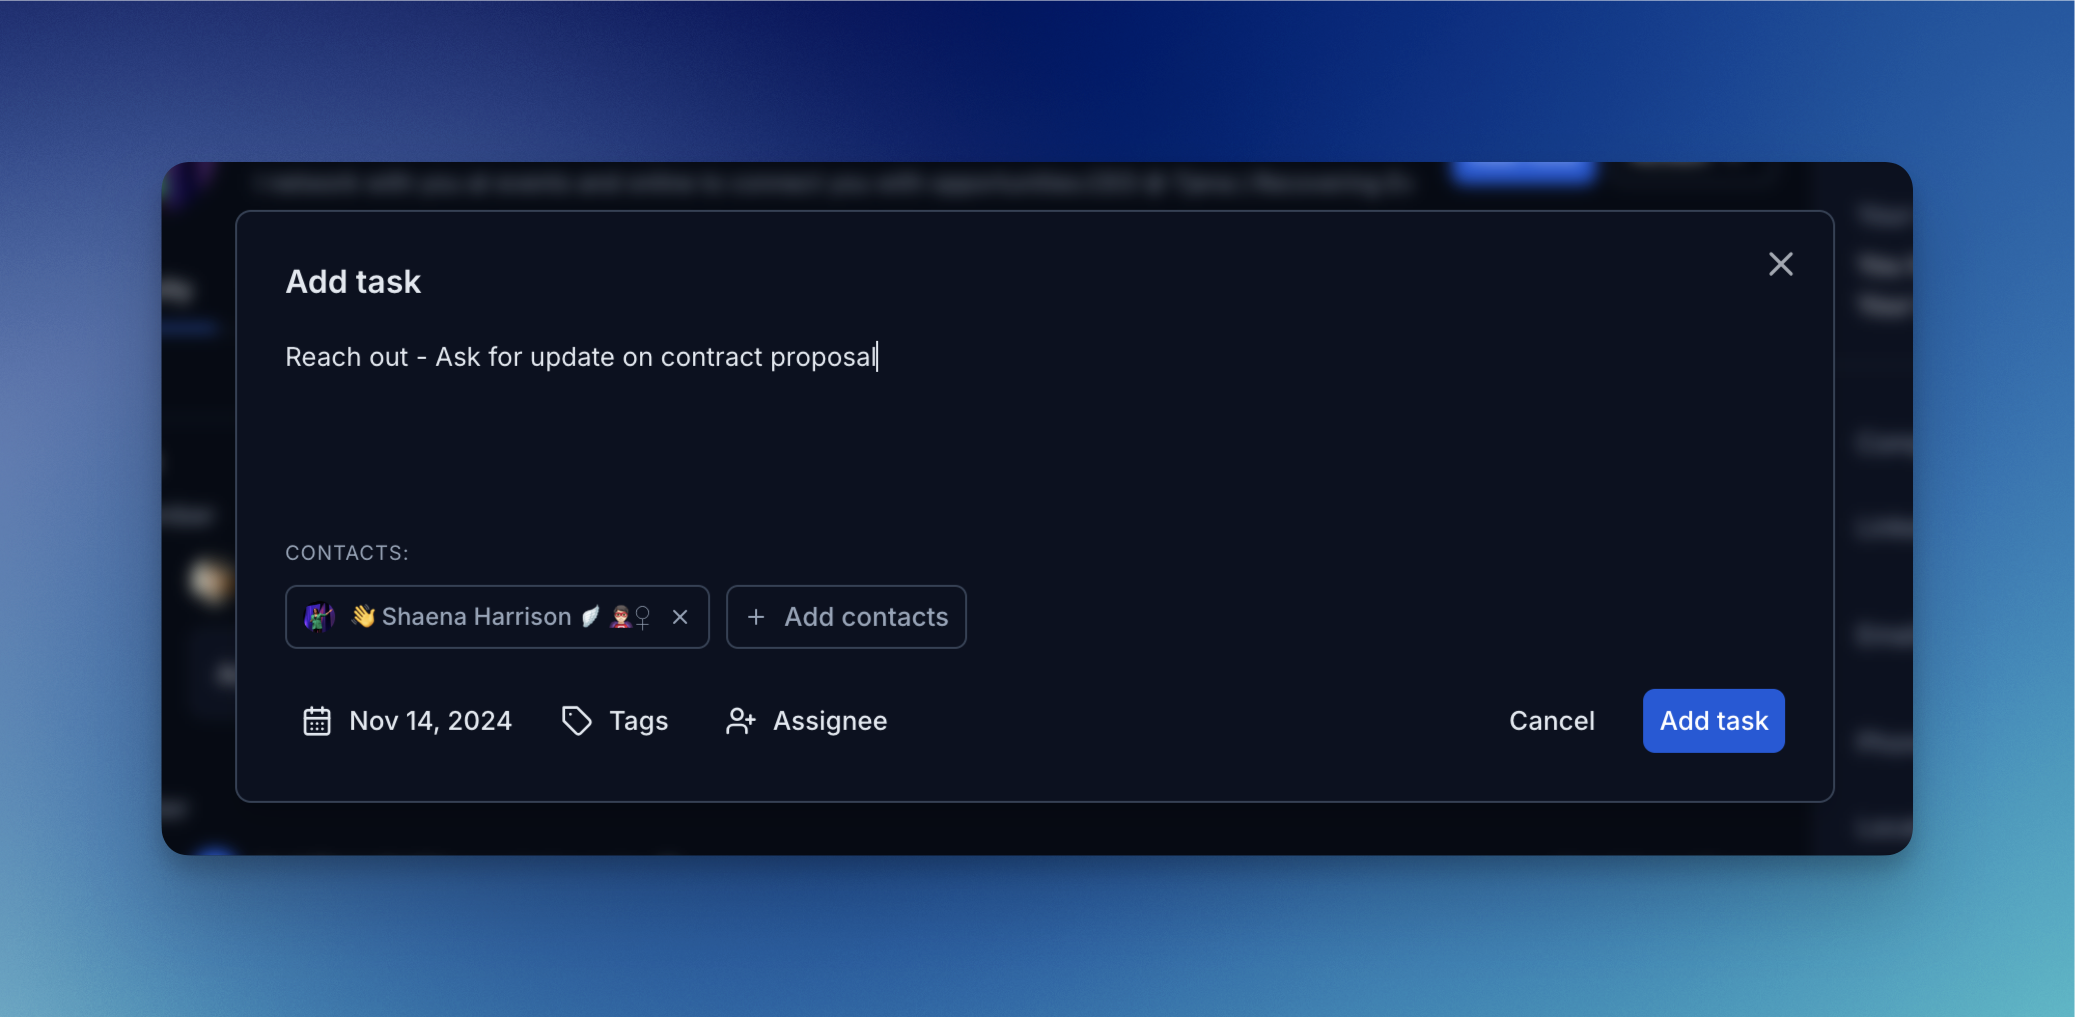
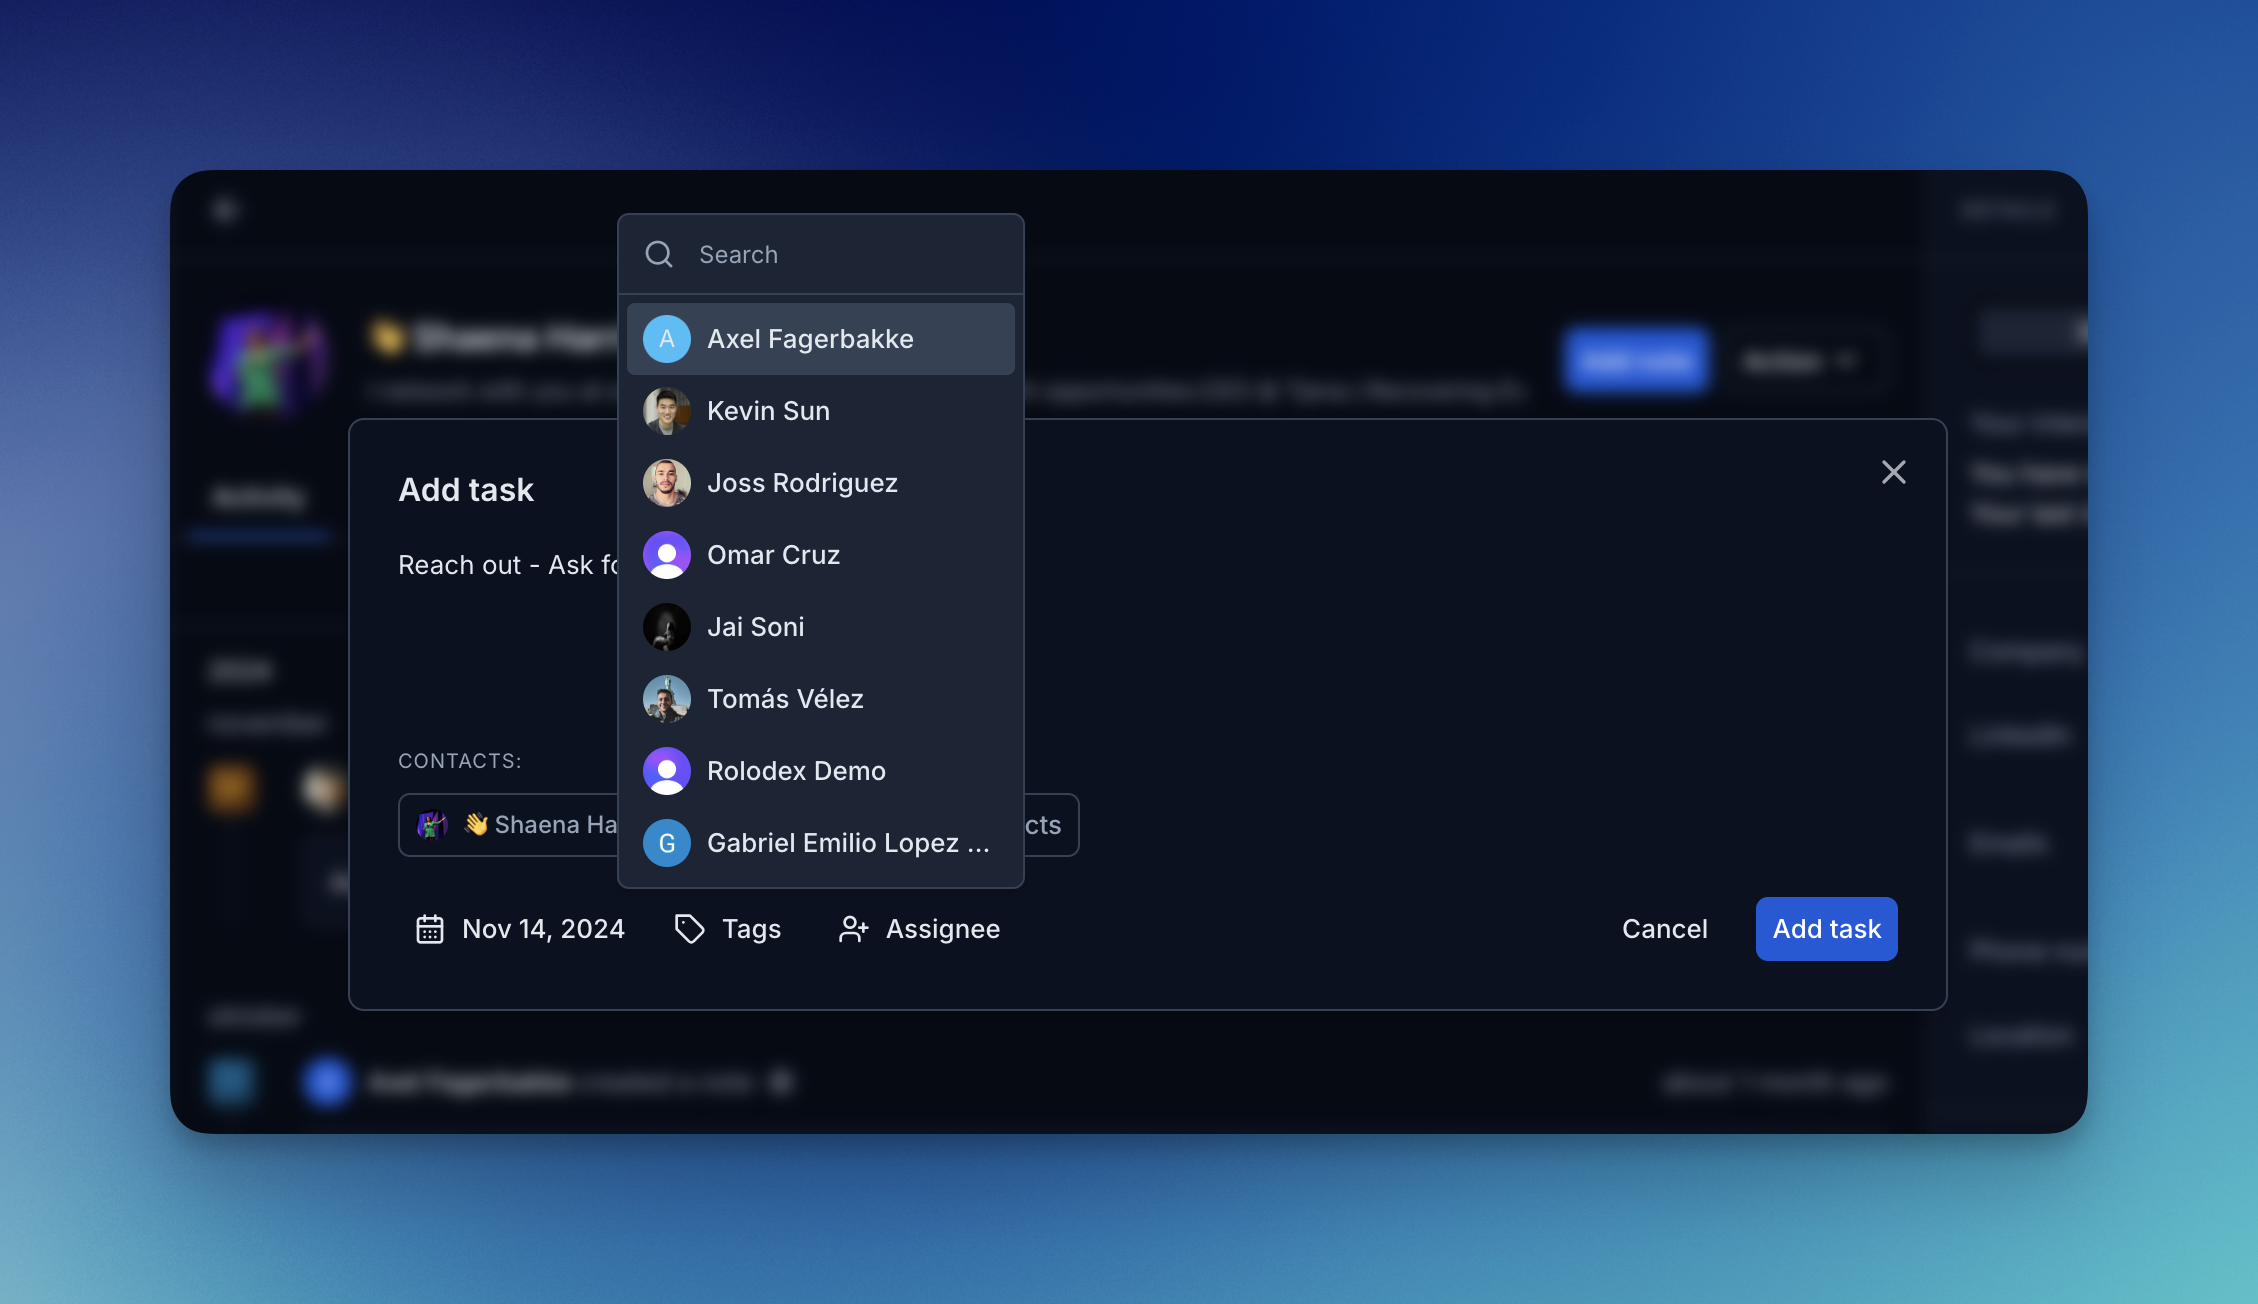
Easily create tasks related to either a contact or a company within Rolodex. Assign these tasks to yourself or any team member and set due dates. With Rolodex being a collaborative space, this ensures smooth management of your team’s relationships by clearly tracking responsibilities and deadlines, keeping everyone aligned.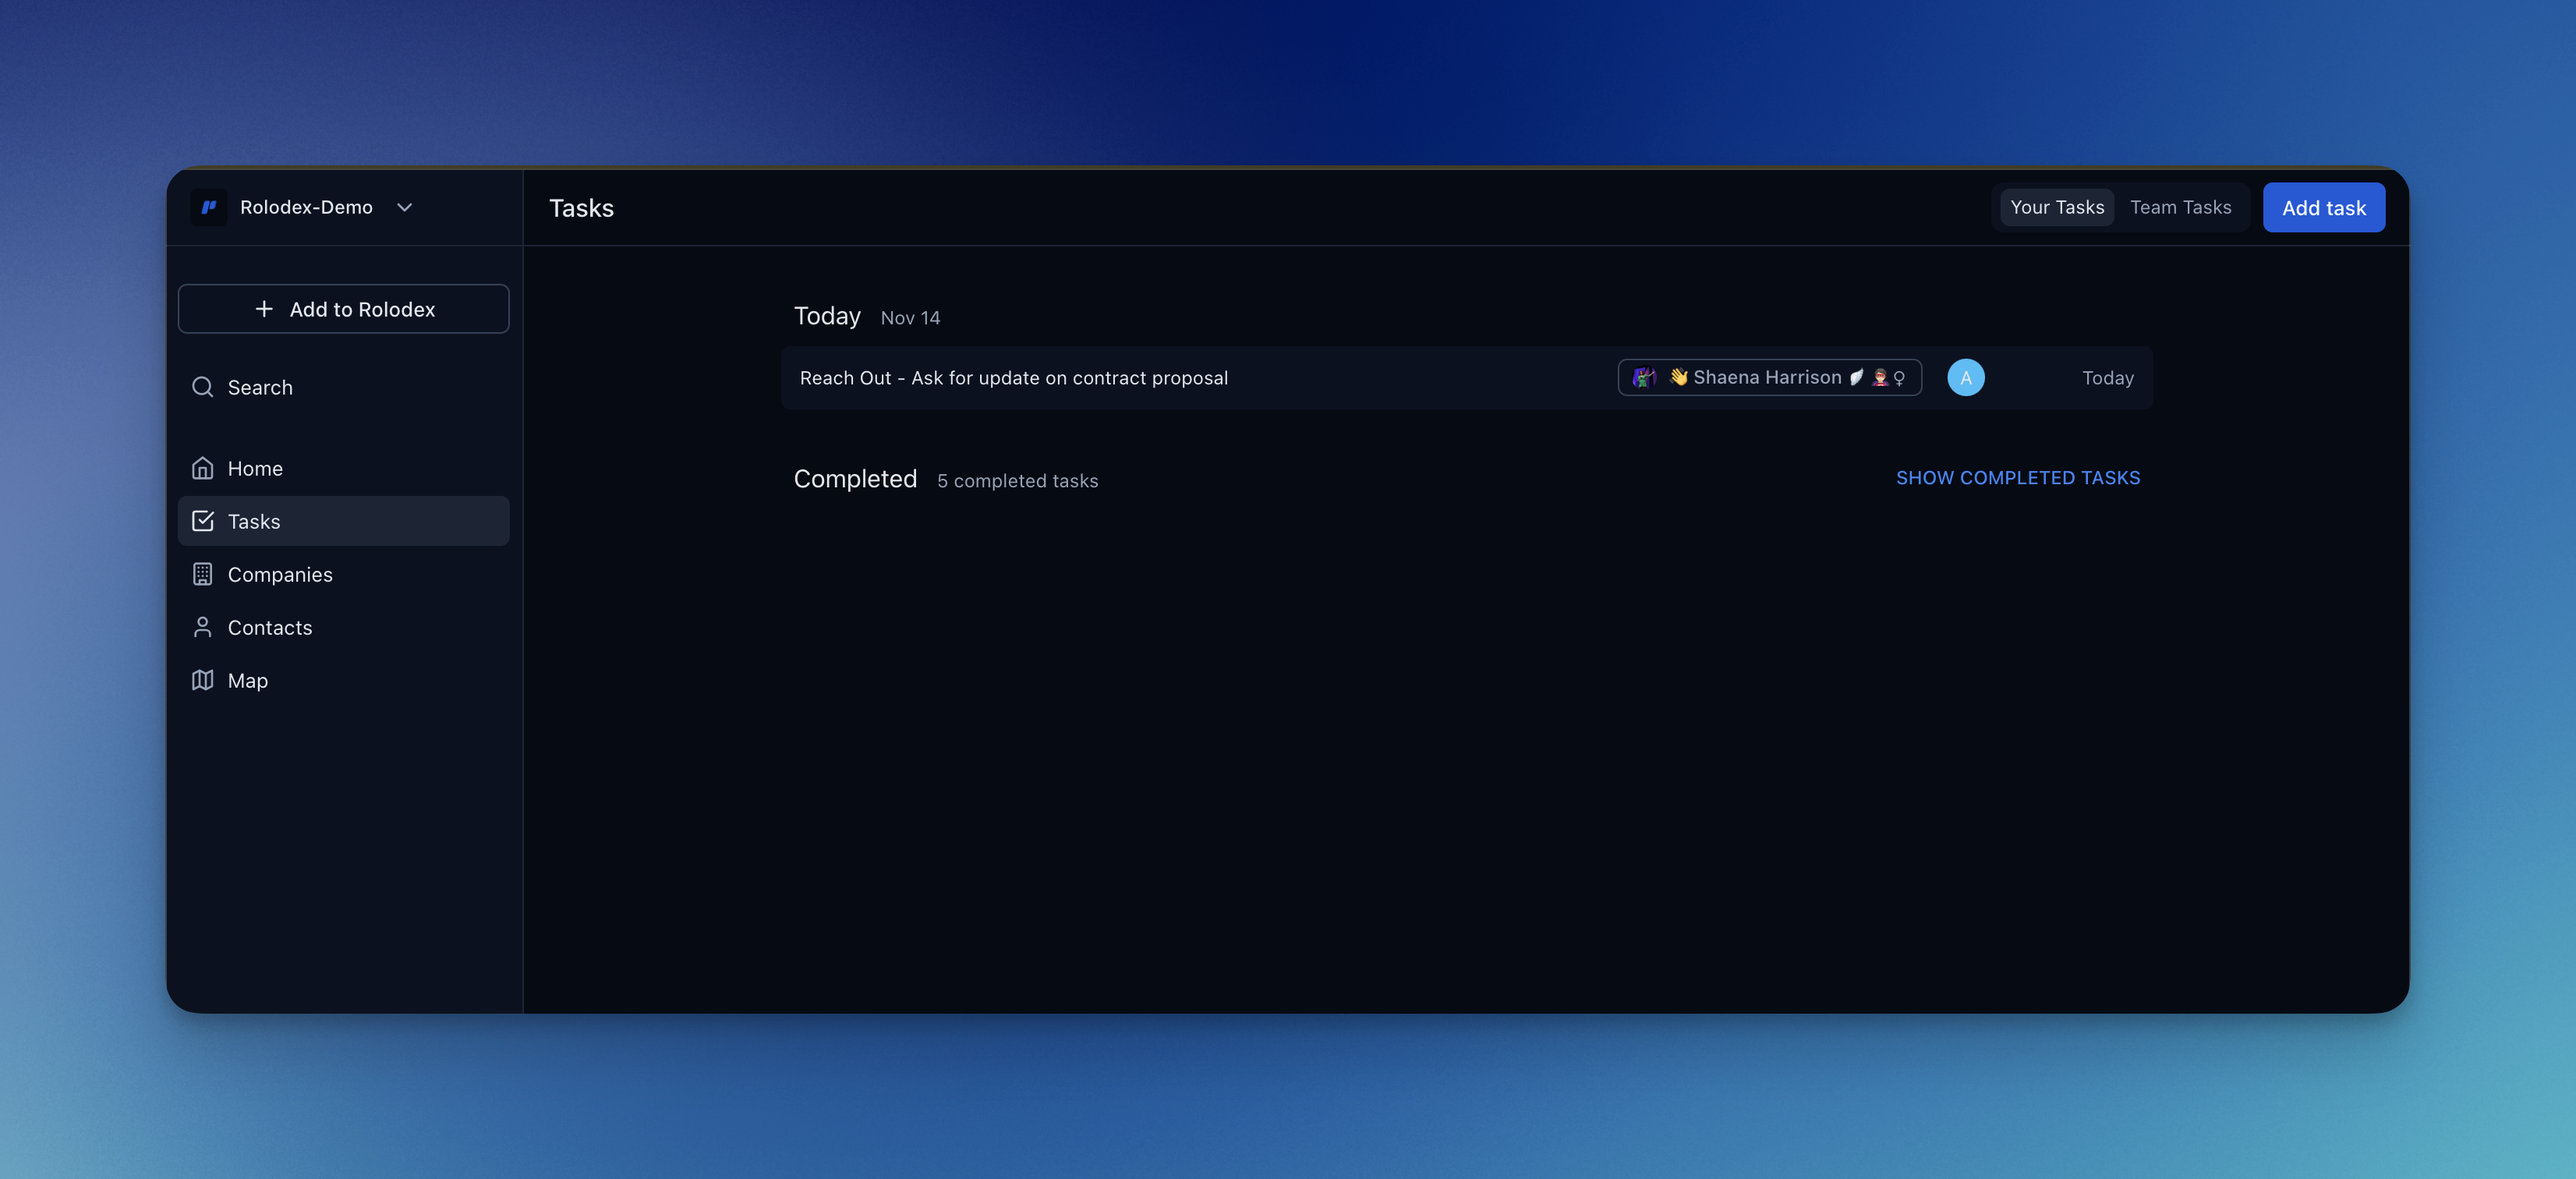
View all tasks from the home page or within the task manager. Here, you can not only track your own tasks but also gain a complete overview of your team’s tasks, allowing for effective coordination and seamless collaboration.
An org chart in Rolodex maps the internal structure of a target account — who sits where, what role each person plays in the buying decision, and which team members already have relationships at each level.Instead of reaching out blind, your team can see the full picture before the first call: who approves budgets, who can block a deal, and where your warmest existing connections already sit.
Key Stakeholder Roles
When building an org chart, tag each contact by their role in the buying process:Economic Buyer
Approves budgets and signs contracts. This is the person who ultimately says yes or no to a purchase.
Technical Evaluator
Assesses whether your product is the right fit. They can block a deal even if leadership is on board.
Internal Champion
An advocate inside the account who supports your deal and helps move it forward internally.
Gatekeeper
Controls access to other stakeholders. Building trust here often determines whether you get the right meetings.
How to Build an Org Chart
Open or create a company profile
Navigate to the Companies section in Rolodex and open the target account. If it doesn’t exist yet, create a new company profile with the basic details.
Add contacts to the company
Import contacts from Gmail, Outlook, or LinkedIn — or add them manually. Record each person’s role, department, and seniority level.
Using Org Charts in Your Sales Workflow
Before outreach — Check relationship coverage to identify warm connections your team already has inside the account. Prioritize those entry points before reaching out cold.During deal reviews — Use the org chart to run structured conversations about stakeholder coverage. Are you multi-threaded? Is there a champion? Who controls the budget sign-off?Before every call — Review the chart to refresh context on who you’re talking to, what role they play, and what interactions your team has already had with others in the account.Keeping Your Org Charts Up to Date
An org chart is only as useful as it is current. Make it a habit to:- Add newly discovered contacts as they surface in conversations or email
- Update roles and titles when people change positions
- Log interaction history after each touchpoint
- Flag relationship gaps — accounts where you’re only single-threaded are at risk
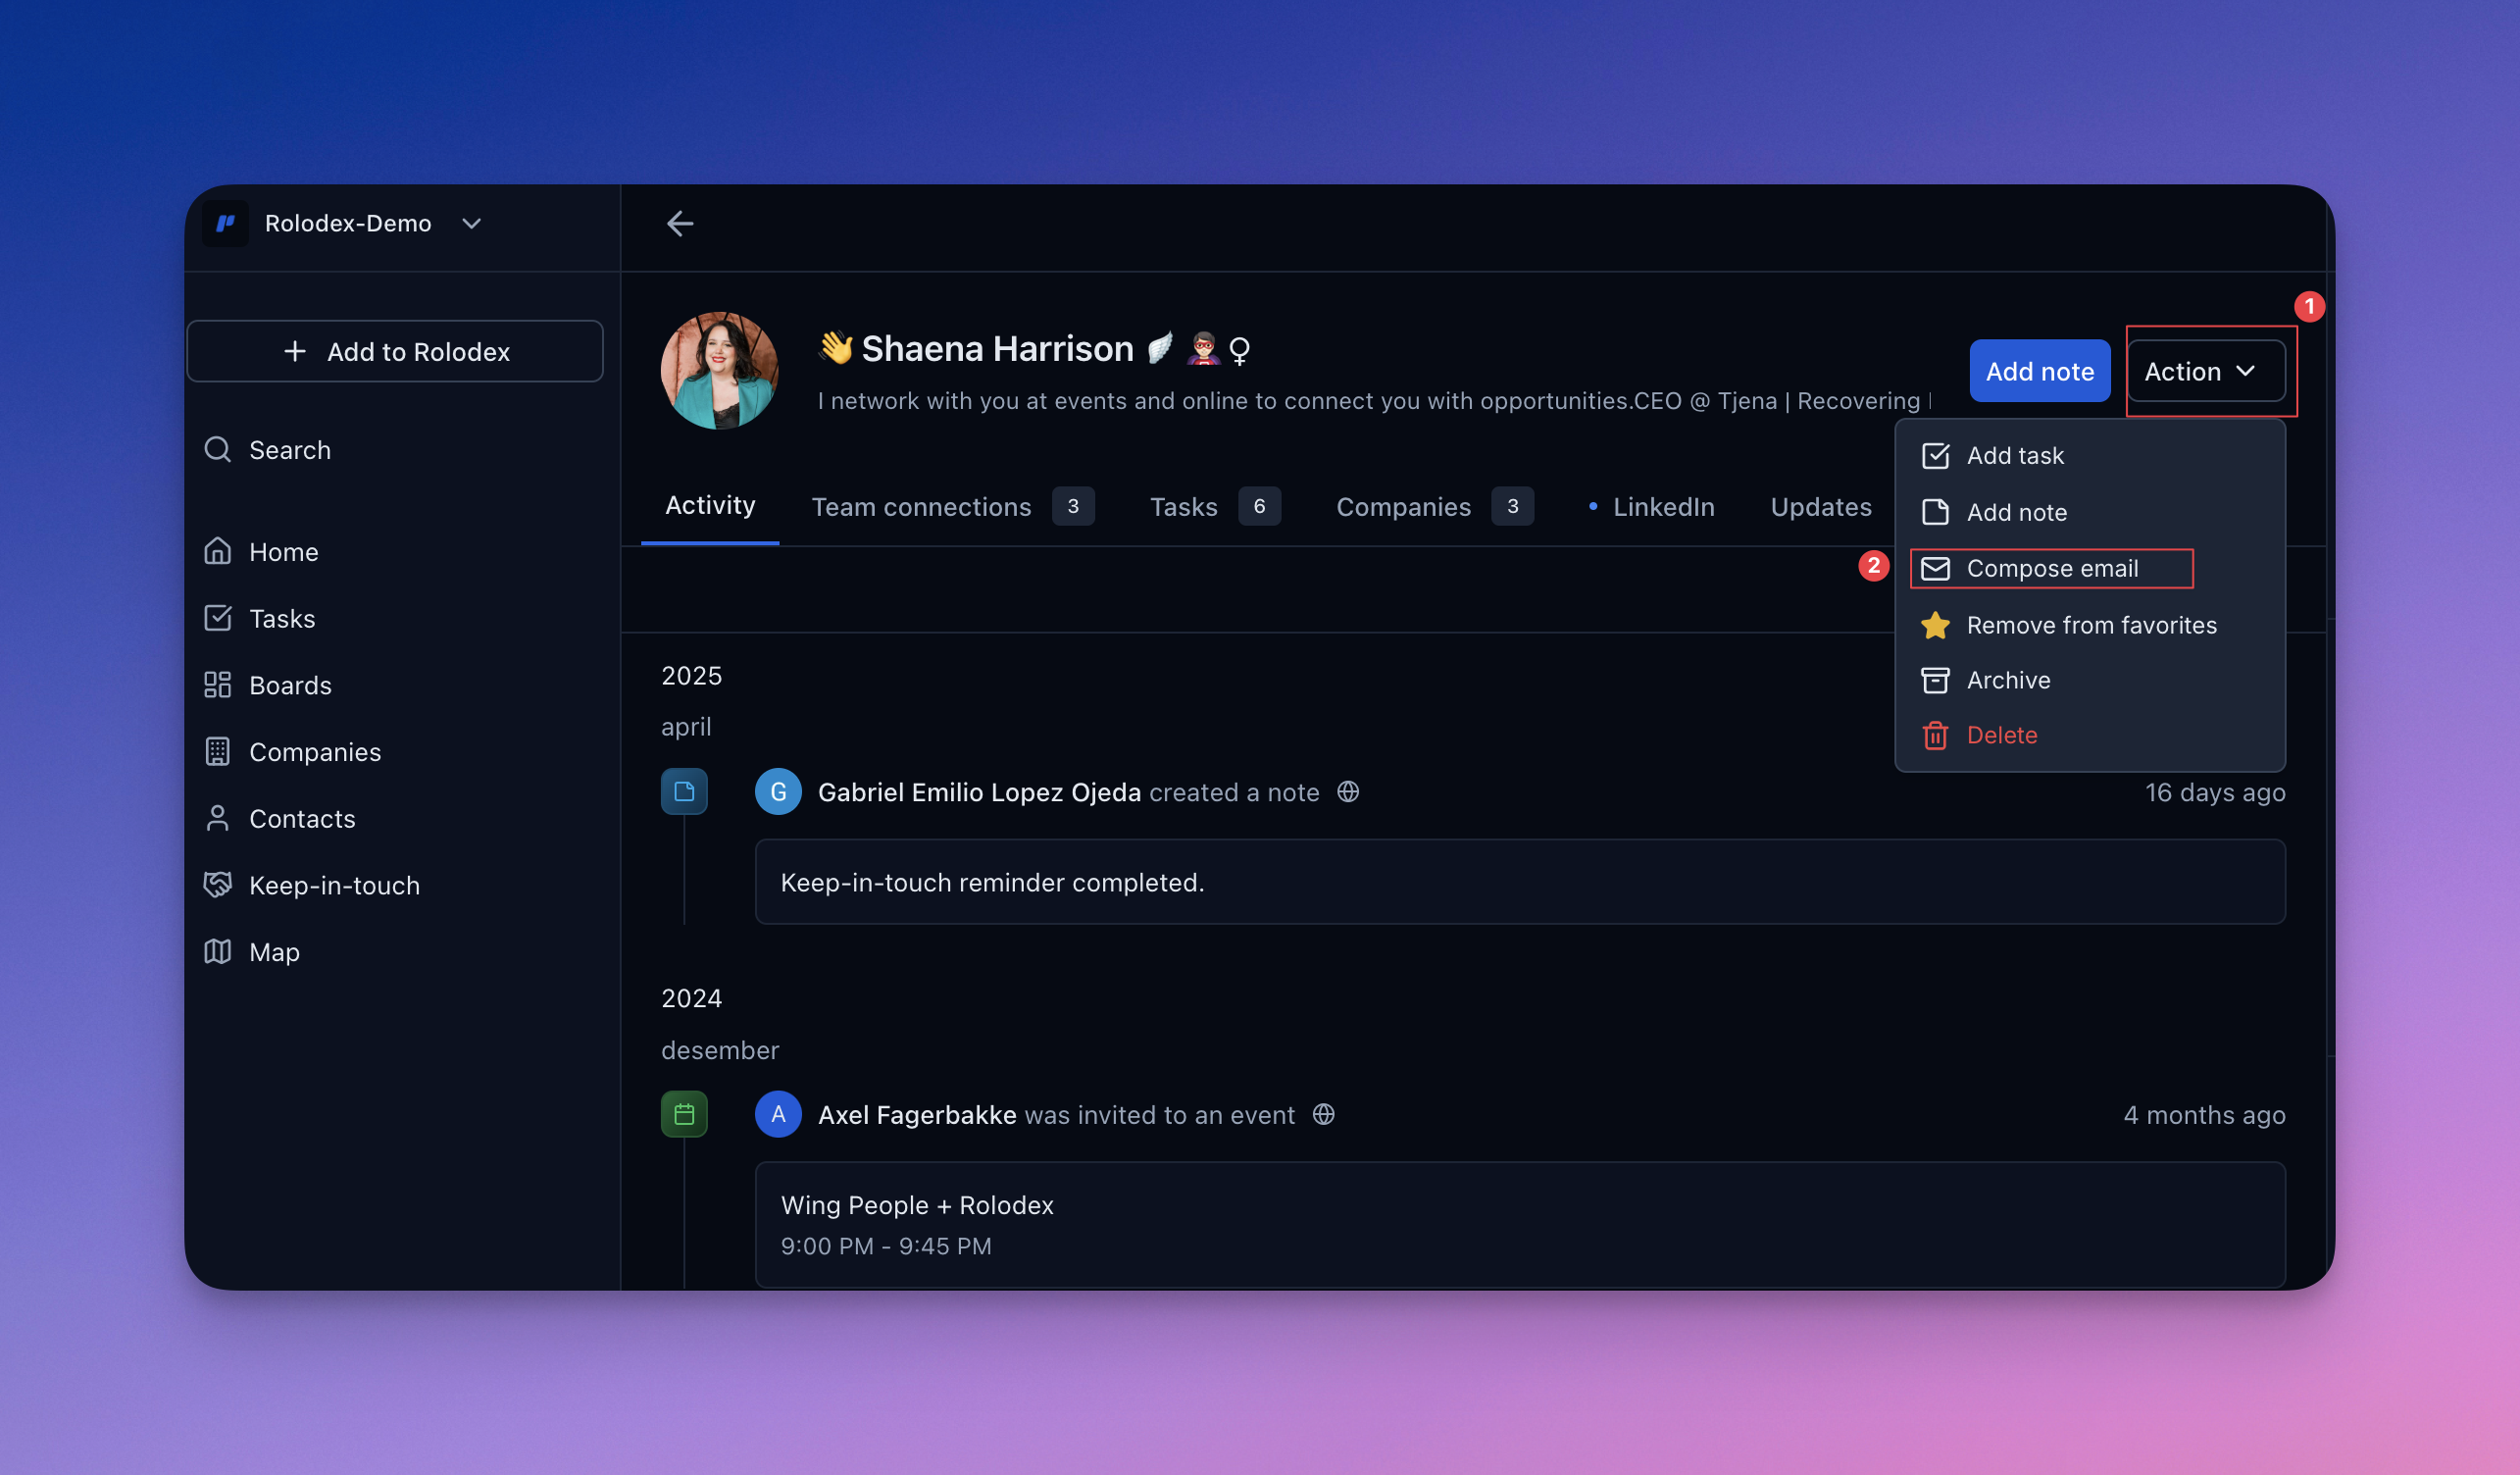
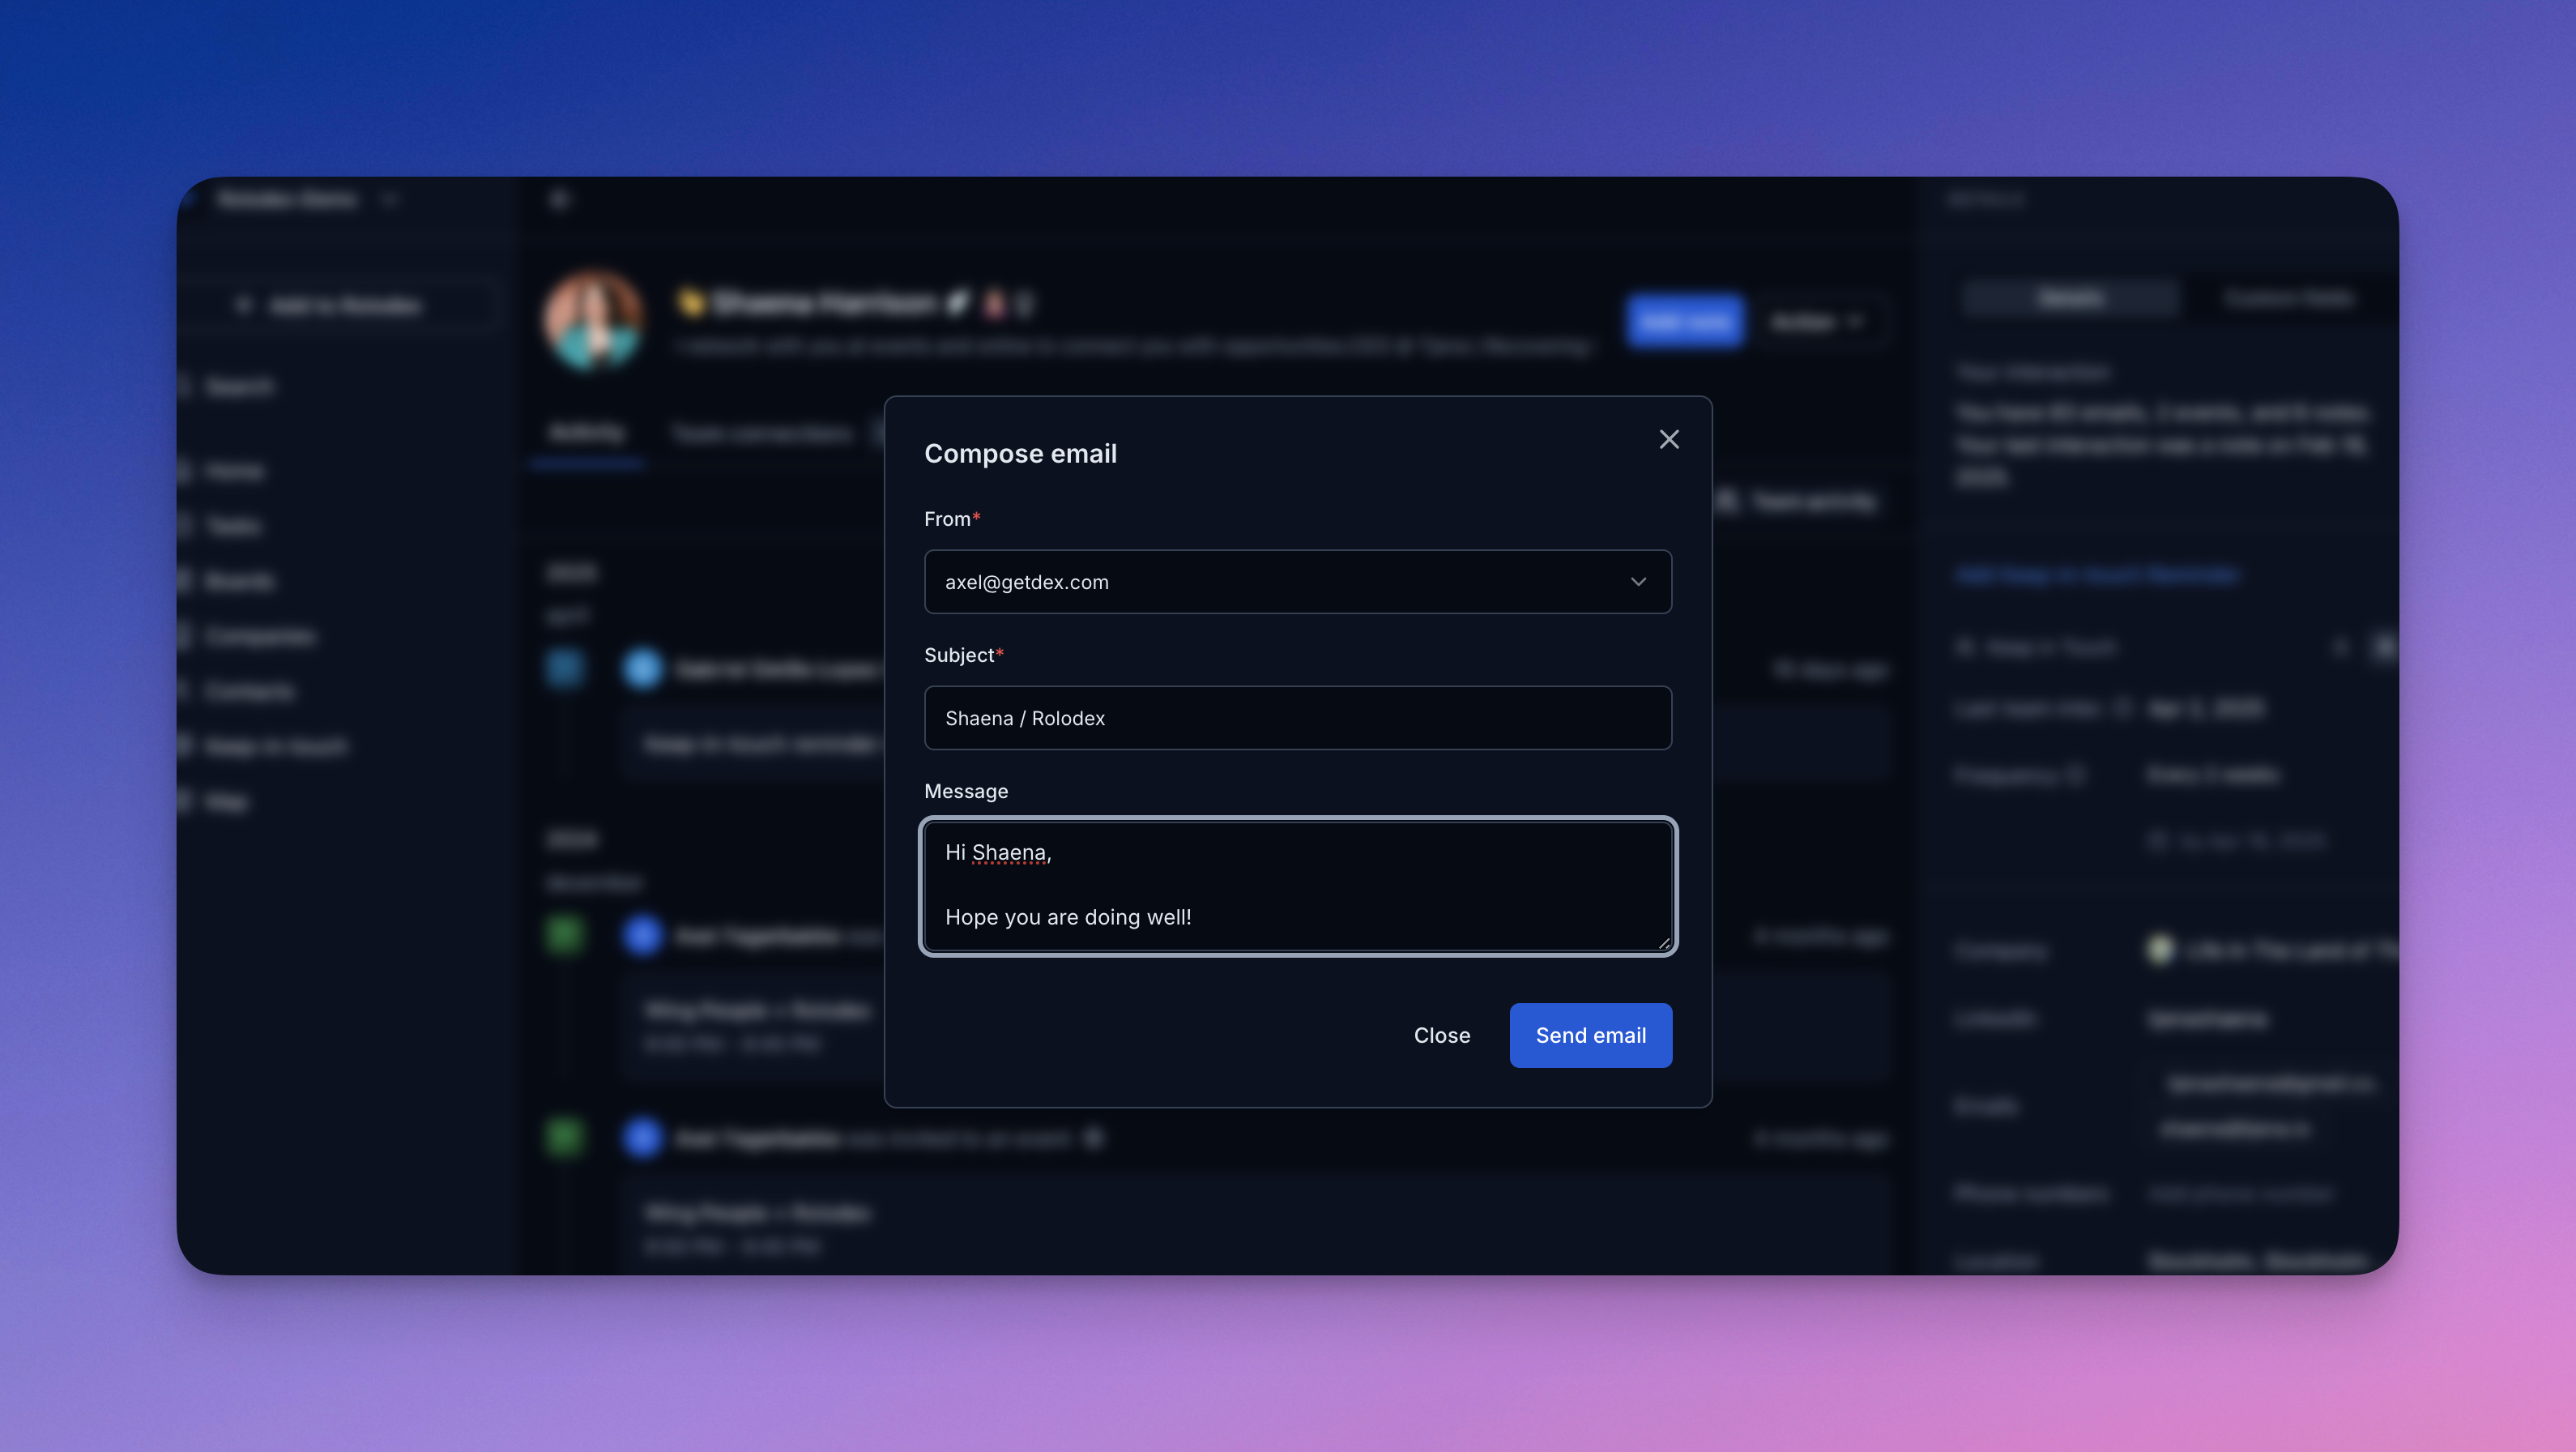
Rolodex allows you to send emails directly from within the platform—so you can stay in touch with key contacts without switching tabs. Whether you’re following up after a meeting, reconnecting with an old contact, or reaching out to multiple stakeholders, Rolodex brings communication into the same place where you manage your relationships.
To send an email from Rolodex, the contact must have an email address stored in their profile. Make sure the email field is filled out before composing your message.
How to send an email from Rolodex
Navigate to the contact you want to email
You need to send an email from the contacts profile page.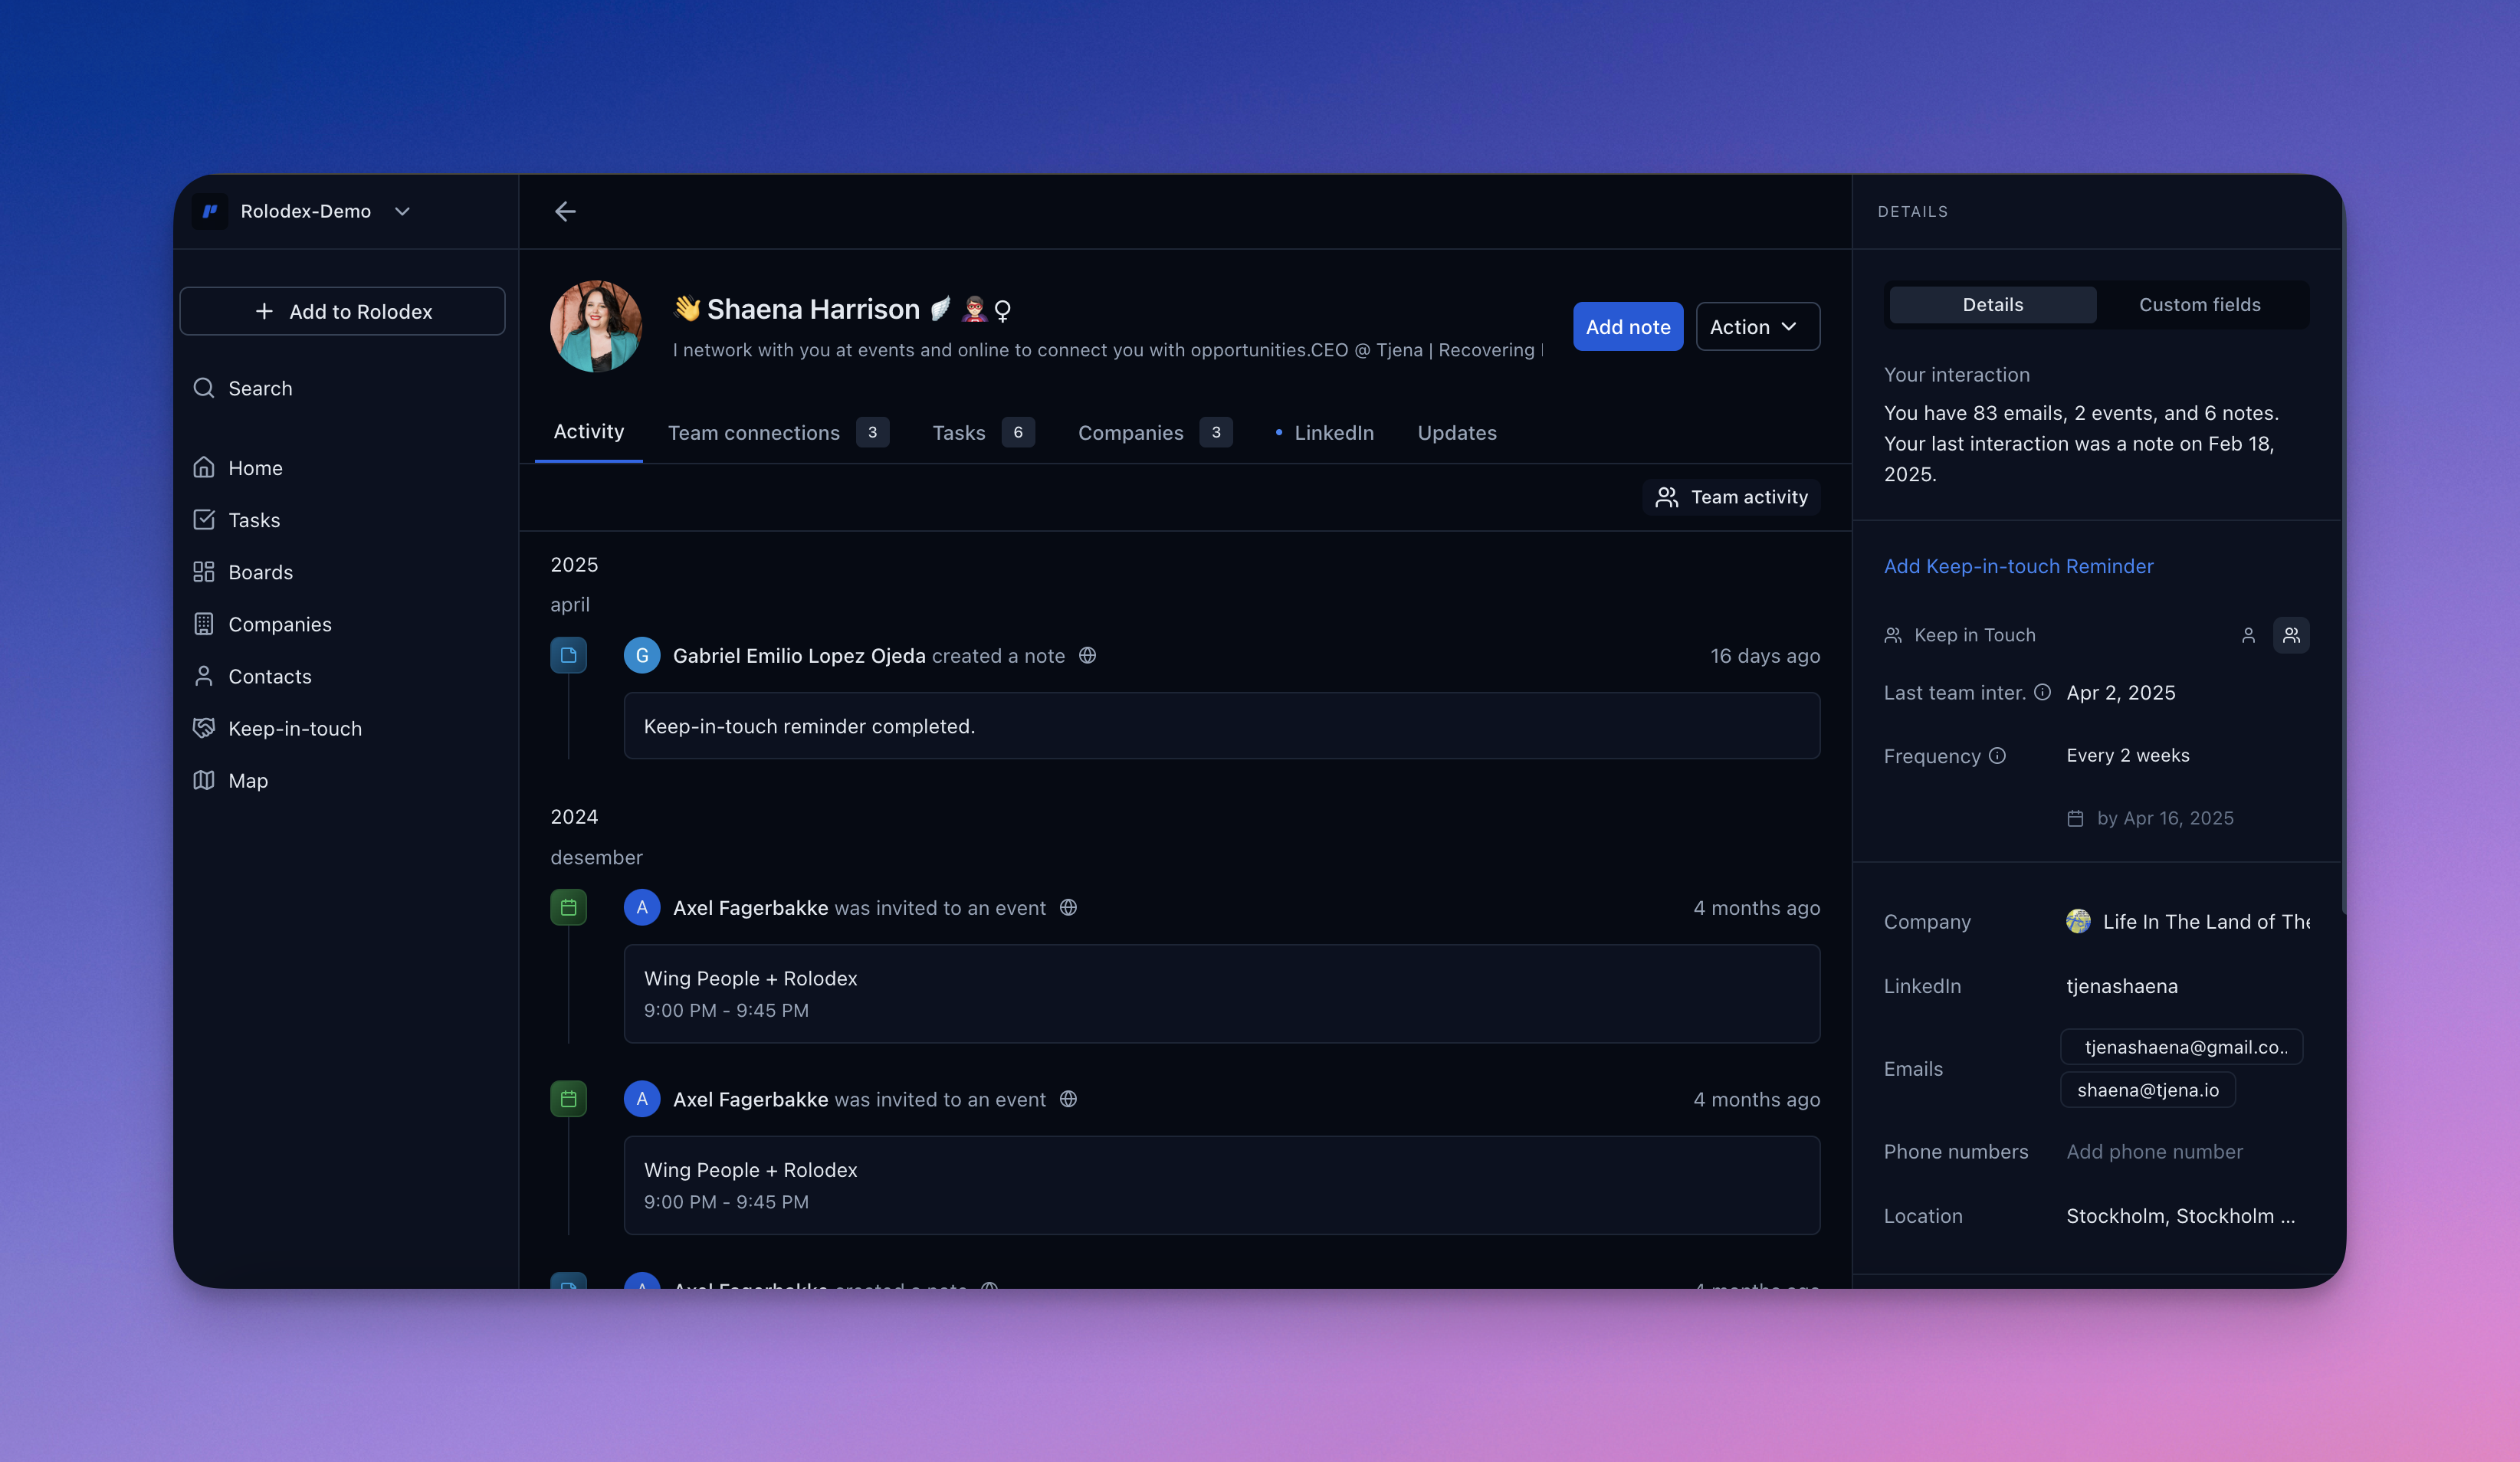
Make sure that you have that contacts email stored under “Emails” on the profile.
Select multiple contacts using the checkboxes in your contact list to act on them all at once. A toolbar appears with bulk actions including Add to list, Add tag, Edit field, and Set company.
Set company on multiple contacts
Use Set company to assign the same company to every selected contact in one step—no need to edit them one at a time.Select the contacts
Tick the checkboxes for the contacts you want to update (or use Select all to grab an entire filtered view).
This is especially handy after a LinkedIn sync or import: bring contacts in, then fix the company across hundreds of them at once instead of editing each contact individually.